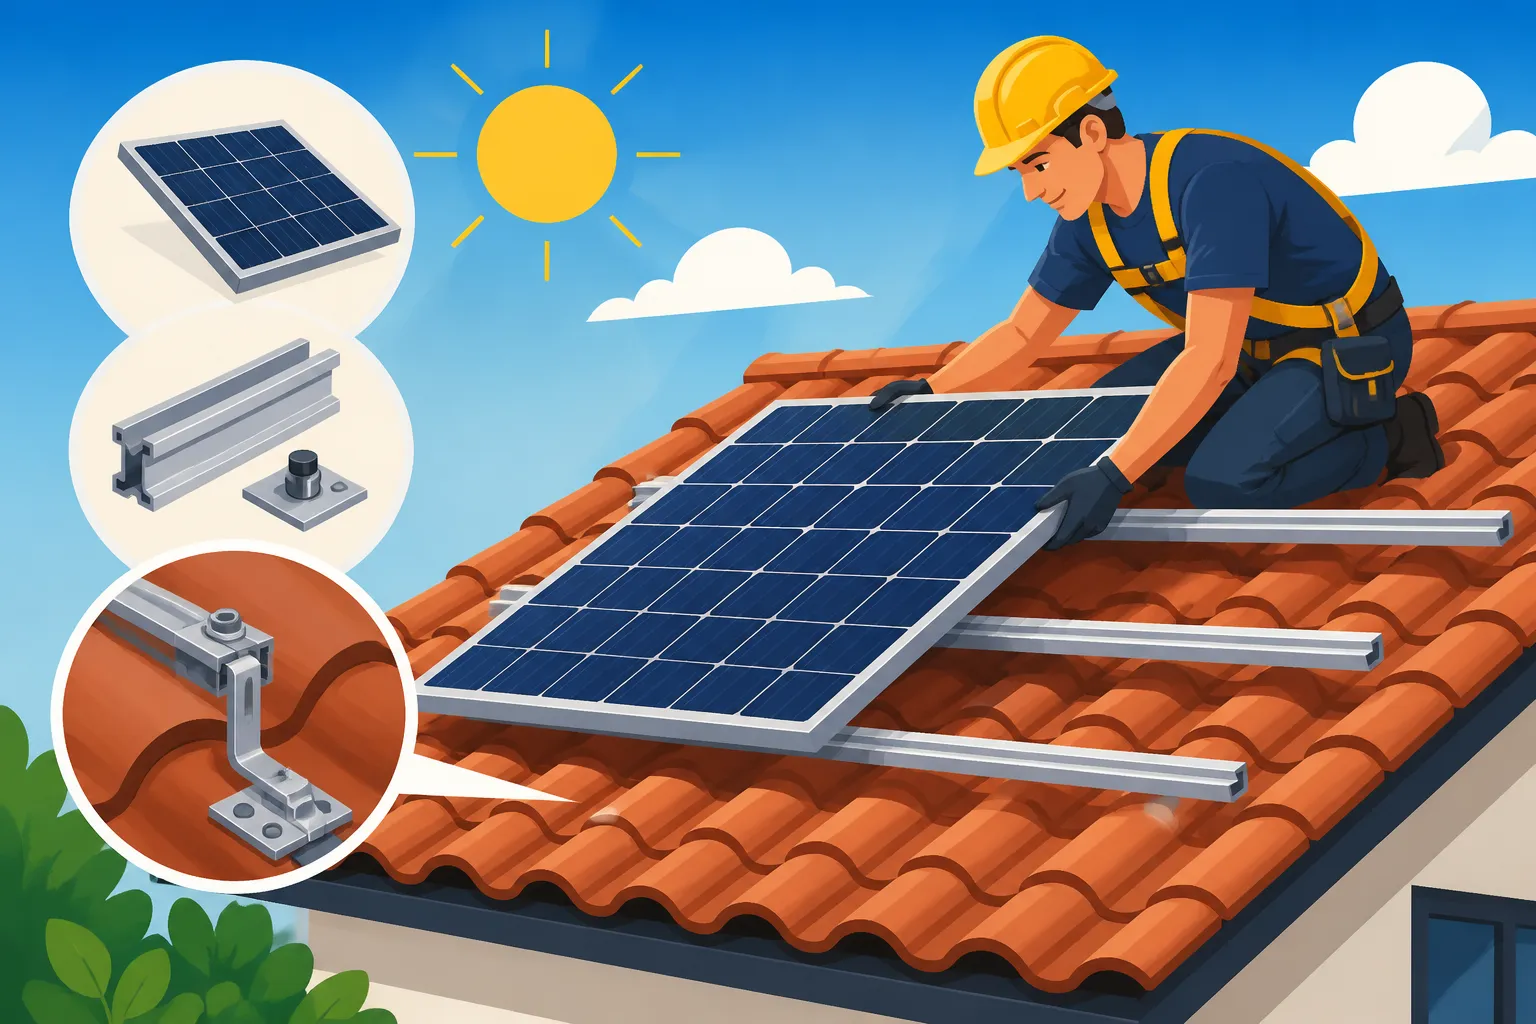
How to Install Solar Panels on a Tile Roof
You're probably dreaming of going solar, picturing those sleek panels soaking up the sun's rays and watching your electricity bill shrink. But then reality hits: your home has a beautiful, perhaps even historic, tile roof. Immediately, questions pop up: can solar panels even be installed on tile? Will it damage my roof? This guide is here to walk you through the unique considerations and the actual process of installing solar panels on a tile roof, ensuring you have all the information you need to make an informed decision and protect your investment.
Understanding the Unique Challenges of Tile Roofs for Solar
Let's be real, tile roofs are absolutely stunning, adding incredible character and curb appeal to a home. But when it comes to solar installation, they definitely present a different set of challenges compared to a standard asphalt shingle roof. It's not impossible, not by a long shot, but it requires a specialized approach, and ignoring these nuances can lead to costly mistakes down the line.
Fragility and Weight Distribution Concerns
The biggest hurdle with tile roofs is their inherent fragility. Think about it: ceramic, concrete, or clay tiles are designed to interlock and protect your home, but they aren't meant to be walked on or have heavy equipment placed directly on them without proper precautions. A careless step from an installer can easily crack or shatter a tile, leading to potential leaks or compromised aesthetics. This means the installation team needs to be exceptionally skilled and meticulous, often using specialized equipment like roof ladders or platforms to distribute their weight and avoid direct contact with the tiles.
Beyond fragility, there's also the weight of the solar array itself. While solar panels are surprisingly light per square foot, a full system can still add a significant load to your roof structure. This is generally less of an issue for newer homes built to modern codes, but if you have an older home with original tile, a structural engineer's assessment might be a crucial first step. The last thing you want is a beautiful solar system only to discover your roof wasn't quite ready for the commitment. Installers should always consider the overall roof structure, not just the individual tiles, when planning an installation, ensuring proper load bearing and structural integrity.
Maintaining Roof Integrity and Aesthetics
The whole point of a tile roof, besides its durability and weather resistance, is its distinctive look. Homeowners often worry that adding solar panels will detract from this aesthetic or, worse, compromise the roof's ability to protect their home from the elements. This is a very valid concern. Traditional solar mounting systems sometimes require drilling directly through tiles or extensive tile removal, which can be messy and leave visible repairs. However, modern techniques and mounting hardware have evolved considerably to minimize this impact.
The goal isn't just to put panels on; it's to integrate them seamlessly while preserving the waterproof barrier your roof provides. This means carefully lifting or removing tiles, installing flashing and mounting hardware directly to the roof rafters, and then meticulously replacing or recreating the tile layer around the mounts. It’s an art as much as a science. A reputable installer understands the importance of maintaining your roof’s integrity, ensuring that flashing properly diverts water and that any replaced tiles match as closely as possible, preserving both the function and the beauty of your home. It’s important to ask potential installers about their specific methods for managing water sealing around penetrations to prevent future leaks, as this is one of the most common issues with poorly executed tile roof solar installations.
The Step-by-Step Installation Process on a Tile Roof
Installing solar panels on a tile roof isn't something just any crew can do. It requires specific expertise, tools, and a meticulous approach. Think of it less like a simple bolt-on job and more like a careful surgical procedure for your roof. Getting this process right ensures your solar system is secure, your roof remains leak-free, and your home retains its charm. If you're wondering how exactly the whole process unfolds, it's typically a multi-stage journey, much like any significant home renovation.
Initial Assessment and Planning
Before a single panel is ordered or a tool is picked up, the real work begins with a thorough assessment and design phase. This usually starts with a detailed site survey. An expert will come out to your property to inspect your roof's condition, its age, and critically, the type of tiles you have. Are they Spanish tiles, flat concrete tiles, or something else? Each type can dictate slightly different approaches. They’ll also look at the structural integrity of your roof, your home's electrical system, and any potential shading issues from trees or other structures. This is also when they'll consider your energy consumption patterns to determine how many solar panels do I need for my home?
Following the physical assessment, the design team will create a customized solar system plan. This includes everything from the optimal placement of panels to maximize sunlight exposure and energy production, to the precise layout of the mounting system. For tile roofs, this plan will explicitly detail where tiles need to be removed or modified, and what type of flashing and racking system will be used. This stage is crucial for securing the necessary permits. Often, your solar provider will handle this complex process of Solar Permitting & Interconnection (PTO) Explained with your local municipality and utility company, which can take several weeks or even months depending on where you live. This comprehensive planning helps ensure a smooth Solar Installation Timeline: What to Expect and avoids surprises during the physical installation. It's during this phase that you'll also be discussing various system components, like whether to use traditional string inverters or microinverters, which can affect the overall look and performance.
Specialized Flashing and Mounting Techniques
Once the design is approved and permits are in hand, the actual installation can begin. This is where the specialized expertise for tile roofs really shines. Unlike asphalt shingles where installers might simply drill through the shingle and seal, tile roofs require a more delicate touch. The most common approach involves carefully lifting specific tiles where the mounting brackets will be attached. In some cases, tiles might need to be temporarily removed and stacked, while in others, a tile-lifting tool is used to create enough space.
The next critical step is installing the specialized flashing. Instead of drilling directly into the tile, the flashing is secured under the tile, directly to the roof rafters or sheathing. This flashing acts as a waterproof barrier, directing any moisture away from the penetration point. Manufacturers like IronRidge and EcoFasten offer excellent tile roof mounting solutions, providing specialized flashing and racking systems designed to integrate seamlessly with various tile types. Once the flashing is in place, the racking system—the framework that holds the solar panels—is attached. Finally, the original tiles are either re-laid over the flashing and racking system or, if necessary, trimmed and sealed around the mounting posts. This meticulous process ensures that the roof's waterproofing remains intact and that the panels are securely anchored. You might find it helpful to compare different options for How Are Solar Panels Attached to a Roof? to understand the nuances of various methods.
Sealing and Post-Installation Inspections
After the panels are mounted and connected, the job isn't quite finished. A crucial final step, especially for tile roofs, is the thorough sealing of all penetrations and a comprehensive post-installation inspection. Every single point where the mounting system penetrates the roof needs to be meticulously sealed with a high-grade, weather-resistant sealant. Installers will typically use sealants like those from OSI Quad Max or GE Silicone II, ensuring long-term protection against water intrusion. This attention to detail is paramount to prevent future roof leaks, which can be a homeowner’s worst nightmare.
Once the physical installation is complete, the entire system undergoes a series of inspections. First, the installer will perform their own internal quality check, making sure all connections are secure, wiring is neat, and panels are correctly aligned. This is followed by electrical inspections from local authorities to ensure everything meets code. Finally, the utility company will perform a final inspection, often leading to the much-anticipated "Permission to Operate" (PTO). Only after PTO is granted can your system be energized and start generating electricity. It’s also wise to inquire about Solar Panel Warranties Explained during this phase, not just for the panels themselves, but for the installation work and the roof penetration integrity. Remember that even after PTO, it’s beneficial to understand What Happens After Solar Is Installed? to monitor your system’s performance and savings.
Choosing the Right Installer and Materials for Tile Roof Solar
When you're dealing with a specialty roof like tile, you can't just pick any solar installer off the street. This isn't the time to go with the cheapest bid if that bid comes from a company lacking specific experience. The success and longevity of your solar system, and the integrity of your roof, depend heavily on the expertise of the people doing the work.
Why Experience with Tile Roofs Matters
Finding a solar installer with proven experience working on tile roofs is non-negotiable. An inexperienced crew might inadvertently break tiles, use incorrect mounting methods, or fail to properly seal penetrations, leading to leaks, structural damage, and costly repairs down the road. You want an installer who treats your tile roof with the respect it deserves, understanding its unique characteristics and the specialized techniques required. Don't be shy about asking potential installers specific questions during the bidding process.
Ask them how many tile roof installations they've completed, if they have references from homeowners with similar roofs, and what their process is for handling tile removal, replacement, and sealing. A good installer, for instance, will often carry extra matching tiles or know where to source them, just in case any are damaged during the process. Companies like SolarCity or Sunrun, for example, have extensive experience with various roof types across different regions, but even with larger companies, it's worth verifying the specific crew's tile roof expertise. Online platforms like Modernize can be incredibly helpful here, connecting you with local installers who have the necessary expertise and a track record of successful tile roof projects. It’s a good idea to seek out How to Choose a Solar Installer and ask for references.
The Role of Specific Mounting Hardware and Warranties
The type of mounting hardware used is another critical factor. Generic mounting systems designed for asphalt shingles simply won't cut it for tile. You need specialized tile hooks or flashing kits that are engineered to integrate with the unique contours of tile roofs, ensuring both a secure attachment and a watertight seal. These specialized systems are designed to either replace individual tiles or slip underneath them, using the existing roof structure for support without compromising the tile layer's integrity. High-quality tile mounting hardware is typically made from durable materials like aluminum or stainless steel, engineered to withstand various weather conditions for decades.
Beyond the hardware itself, pay close attention to the warranties offered. A reputable installer will provide a robust workmanship warranty, specifically covering the integrity of the roof penetrations and the installation quality. This is separate from the equipment warranties for your solar panels and inverters. You want assurance that if a leak were to occur down the line due to installation error, the installer stands behind their work and will fix it promptly. Always ask about the length and coverage of their workmanship warranty, especially for a tile roof. When you compare solar installer quotes, ensure that the details of these specialized mounts and warranties are clearly outlined. This due diligence protects your investment in solar and your home's roof.
Pros and Cons of Installing Solar on a Tile Roof
Deciding to go solar, especially with a tile roof, is a big step. It’s natural to weigh the benefits against any potential challenges. While tile roofs present some unique hurdles, they certainly don't negate the significant advantages of embracing solar energy. Understanding both sides of the coin will help you set realistic expectations and feel confident in your decision.
Benefits of Going Solar on Tile
Despite the specific considerations for installation, installing solar panels on a tile roof comes with all the fantastic benefits of any solar system. Firstly, you'll see a significant reduction, if not elimination, of your monthly electricity bills. Imagine freeing yourself from the unpredictable fluctuations of utility rates, especially if you live in an area with high electricity costs like California or New York. Over the lifespan of your system, these savings can amount to tens of thousands of dollars.
Secondly, going solar dramatically reduces your carbon footprint, contributing to a cleaner, more sustainable future. You’re harnessing a renewable energy source, lessening your reliance on fossil fuels. This is a huge win for the environment and for future generations. Furthermore, solar panels can significantly increase your home's value. Studies have shown that homes with solar typically sell faster and for more money than comparable homes without solar. This is a big advantage if you ever plan to sell. Even with the complexities of installation, the long-term financial and environmental gains often far outweigh the initial effort. Plus, many homeowners find the combination of modern solar panels complementing the classic look of a tile roof quite appealing, creating a unique aesthetic blend. If you're concerned about how this affects your property taxes, remember that many states offer Solar Property Tax Exemptions by State.
Potential Drawbacks and Considerations
Now, let's address the flip side. The primary drawback of installing solar on a tile roof is often the increased complexity and, consequently, the potentially higher upfront cost. Because the installation process is more labor-intensive and requires specialized tools and expertise, you might find that Solar Panel Cost Per Watt Explained is higher for a tile roof compared to a standard asphalt shingle roof. This isn't to say it's not worth it, but it's an important financial consideration to factor into your budget and Solar Panel Payback Period Explained calculations.
Another consideration is the potential for minor damage during installation. Even with the most careful and experienced crews, there's always a slight risk of a tile cracking or breaking, especially with older, more brittle tiles. A reputable installer will account for this and have a plan for replacement tiles, but it's something to be aware of. Lastly, depending on the tile type and the specific mounting system used, the visual impact might be more noticeable than on a flat shingle roof. Some homeowners prefer a very low-profile look, and while modern mounting hardware aims to be discreet, the distinct nature of tile roofs can make full concealment challenging. Discussing your aesthetic preferences with your installer, perhaps even asking to see examples of their previous tile roof projects, can help manage expectations. Using a service like Modernize to get multiple quotes allows you to compare not just prices, but also the specific installation methods and aesthetic solutions proposed by different companies for your particular tile roof.
How Different Tile Types Influence Installation
Not all tile roofs are created equal, and the type of tile on your roof plays a significant role in how solar panels can and should be installed. From the classic Spanish curves to the sleek lines of flat concrete, each material presents its own set of characteristics that an installer must consider. Understanding these differences can help you have a more informed conversation with your potential solar provider.
Spanish/Mission Tiles
Ah, the iconic Spanish or Mission tiles! These semi-cylindrical tiles, often seen in the Southwest and Florida, give roofs a distinctive wavy pattern. While beautiful, their curved shape makes direct attachment of a flat solar panel rack a challenge. Installers typically use specialized "tile hooks" or "tile replacements" that slide underneath the existing tiles and hook onto the roof decking or rafters. For example, a company might use a system like Quick Mount PV's QMRM Tile Mounts or EcoFasten's RockIt system, which are specifically designed to accommodate the curves without altering the tile's integrity.
Often, for Spanish tiles, a small section of the tile underneath the mount might need to be trimmed or a custom flashing piece might be installed to create a flat surface for the racking, ensuring a watertight seal. This careful process is key to preventing future Do Solar Panels Cause Roof Leaks? concerns. The goal is always to maintain the natural flow of water over and under the tiles, directing it away from the mounting points. This type of installation is typically more labor-intensive than for flat tiles, reflecting the need for precision and specialized techniques to preserve the roof's classic aesthetic and functionality.
Flat Concrete or Clay Tiles
Flat concrete or clay tiles, often found on modern homes or those with a Mediterranean influence, present a slightly different scenario. While they lack the dramatic curve of Spanish tiles, they are still brittle and require careful handling. The main advantage here is their flat surface, which makes it easier to create a level plane for solar panel mounting. Installers often use a "tile replacement" method where a section of an existing tile is removed and replaced with a metal flashing piece that integrates directly with the racking system.
These flashing pieces are designed to match the profile of the surrounding tiles, ensuring a smooth transition and a watertight seal. Brands like IronRidge or EcoFasten offer robust flashing solutions that sit flush with the roof plane. The installation process still involves carefully lifting adjacent tiles, securing the flashing to the roof structure, and then re-laying the tiles, often with a small gap around the flashing that is then sealed. Because the surface is flat, these installations can sometimes be a bit more straightforward than Spanish tiles, but the fragility and weight distribution aspects remain paramount.
Other Tile Types Slate, Composite, and More
Beyond the most common, there are other types of tile roofs, each with its own quirks. Slate roofs, known for their extreme durability and longevity (often lasting 100+ years), are perhaps the most challenging. Slate is incredibly dense and brittle, making it very difficult to cut or drill without special tools and significant expertise. Any work on a slate roof requires an installer with specific experience in slate repair and installation, often involving custom hangers and careful, precise work to avoid damaging the historical material. The cost for solar on a slate roof can be considerably higher due to this specialized labor and the risk involved.
Composite tiles, which are made from recycled materials and designed to mimic the look of natural slate or wood shake, are generally more forgiving. They are often lighter and less brittle than traditional tiles, making the installation process closer to that of asphalt shingles, though still requiring attention to detail to maintain the composite material's integrity and warranty. For any of these "other" tile types, it's even more critical to find an installer who has direct, verifiable experience with your specific roofing material. This is where researching What Roofs Are Best for Solar Panels? can truly help you understand the compatibility and potential challenges.
| Tile Type | Key Characteristics | Installation Considerations | Typical Mounting Method | Ease of Installation (Relative) |
|---|---|---|---|---|
| Spanish/Mission Tile | Curved, interlocking, often clay | Fragile, requires careful lifting; maintaining water flow is crucial | Tile Hooks, Tile Replacements | Moderate to Complex |
| Flat Concrete/Clay | Flat profile, often interlocking or overlapping | Fragile, requires careful lifting; straightforward for creating level plane | Tile Replacements, Specialized Flashing | Moderate |
| Slate Tile | Dense, brittle, long-lasting, expensive | Extremely fragile, difficult to cut/drill; requires specialized slate experience | Custom Slate Hangers, Flashing | Highly Complex |
| Composite Tile | Lighter, more flexible, mimics natural materials | Less fragile than traditional tile; generally easier to work with | Standard Flashing, Racking | Easier |
What to Expect After Installation and Long-Term Care
So, your solar panels are finally up on your beautiful tile roof, the inverter is humming, and your utility meter is spinning backward (or at least very slowly!). But the journey doesn't end there. Understanding what happens next and how to care for your system and roof long-term is key to maximizing your investment and enjoying decades of clean energy.
Monitoring Your System's Performance
Once your system is operational, you'll want to keep an eye on its performance. Most modern solar systems come with sophisticated monitoring apps or web portals provided by companies like Enphase or SolarEdge. These platforms allow you to track your real-time energy production, view historical data, and often even see your estimated savings. It's a fantastic way to feel connected to your energy production and ensure everything is working as expected. If you notice a sudden dip in production that isn't explained by weather conditions, it might be a good time to reach out to your installer for a check-up.
Regular monitoring isn't just about curiosity; it's about being proactive. Catching potential issues early, such as a faulty microinverter or excessive shading from new tree growth, can prevent long-term energy loss and ensure your system continues to operate at peak efficiency. Your installer should provide you with a detailed walkthrough of how to use your monitoring system and what numbers to look for. Over time, you'll become quite adept at understanding your system's rhythm and recognizing when something seems off.
Maintaining Your Tile Roof with Solar
The good news is that solar panels require very little maintenance themselves – maybe an occasional cleaning if you live in a particularly dusty area or notice significant bird droppings. However, your roof still needs attention. Even with the best installation, it’s a good idea to periodically inspect your tile roof, or have a professional do it, especially after severe weather events. Look for any displaced or cracked tiles, particularly around the solar array. While the solar mounting system should protect the penetration points, general roof maintenance is still essential.
If you ever need to have roof repairs done that involve the area under or around your solar panels, it’s crucial to contact your solar installer or a certified solar professional. They have the expertise to safely de-energize and temporarily remove panels, allowing roofers to work, and then re-install them correctly, ensuring all seals and connections remain intact. This prevents potential damage to your solar equipment and maintains the integrity of your roof and your solar warranties. Consider this part of the Solar Panel Maintenance & Cleaning routine, but specifically for your tile roof.
Long-Term Value and Warranty Considerations
One of the great things about going solar is the long-term value it adds to your home. Beyond the immediate energy savings, a well-installed system on a tile roof can enhance your home’s market appeal. Buyers are increasingly looking for energy-efficient homes, and a solar array, even on a distinctive roof, is a major selling point. It also offers a hedge against rising electricity costs, providing predictable energy expenses for decades to come.
As for warranties, you'll typically have several layers: a product warranty for the panels (often 25+ years), an inverter warranty (10-25 years), and most importantly for tile roofs, a workmanship warranty from your installer. This workmanship warranty should cover any issues related to the installation itself, including roof leaks or structural problems that arise from their work. Make sure you understand the terms and duration of all your warranties before signing any contracts. Knowing that your investment is protected by comprehensive warranties can provide significant peace of mind for the long haul. Remember, these warranties are crucial for protecting your investment and ensuring your system continues to perform.
Disclaimer
Please note that this guide provides general information about installing solar panels on a tile roof. Specific requirements, regulations, costs, and available incentives can vary significantly based on your exact location, local building codes, utility company policies, and the specific type and condition of your roof. Always consult with multiple qualified and licensed solar professionals and structural engineers for personalized assessments and quotes tailored to your unique home and circumstances.