How Long Does Solar Installation Take in Massachusetts?
Embarking on the journey to go solar in Massachusetts can feel like stepping into a maze of questions, not least of which is: "How long is this whole thing actually going to take?" It's a completely fair concern, because while the physical installation of panels might be surprisingly quick, the entire process from your initial inquiry to flipping the switch and truly owning your power can span several months. This comprehensive guide will walk you through every stage of the solar installation timeline in the Bay State, giving you a realistic picture of what to expect from start to finish.
Understanding the Massachusetts Solar Installation Process
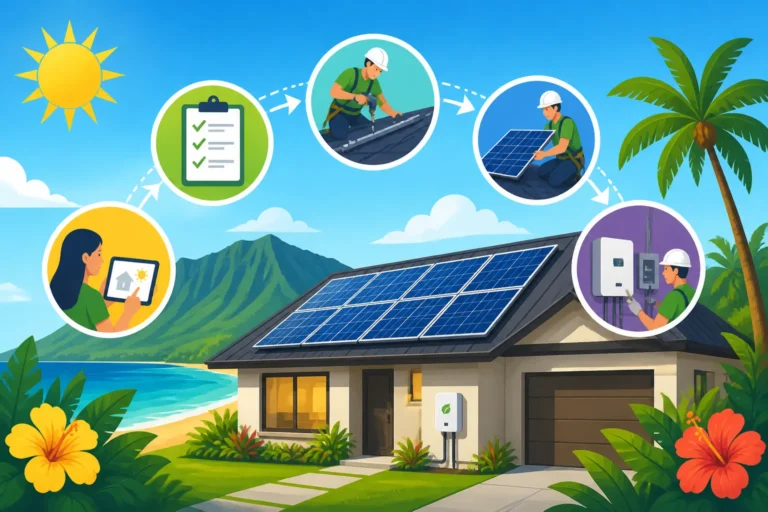
Before any work even begins on your roof, there's a significant amount of groundwork that needs to happen. This "pre-installation" phase is often the longest part of the solar journey, involving everything from initial consultations to securing all the necessary approvals. It's where many homeowners feel a bit in the dark, waiting for permits or utility approvals, and understanding these steps can help manage expectations.
Initial Steps: Site Visit and Design
Your solar journey truly kicks off with a conversation and a site visit. When you first reach out to a solar provider, they'll typically gather some basic information about your home's electricity usage and your address. This allows them to do a preliminary assessment using satellite imagery and publicly available data. Then, a more in-depth site visit will be scheduled. During this visit, a solar professional will come to your home, assess your roof's condition, orientation, and shading, and check your electrical panel. They’ll also discuss your energy goals and current electricity bills to accurately size a system that meets your needs.
This initial assessment and design phase is crucial. The solar company will use all this information to craft a custom solar panel system design for your home. This includes deciding on the number and type of panels, inverter technology (like those from Enphase or SolarEdge), and where everything will be placed. They’ll also provide you with a detailed quote, outlining the costs and estimated savings. This stage, from your first call to a finalized design proposal, can take anywhere from 1 to 4 weeks, depending on how quickly you schedule appointments and make decisions. Resources like Modernize can help streamline this initial step by connecting you with pre-screened installers, making it easier to compare options and get multiple quotes efficiently.
Permitting and Utility Approval Hurdles
Once you've settled on a solar installer and finalized your system design, the real waiting game often begins: permitting and utility approvals. Your chosen solar company will handle the bulk of this paperwork, but it's a process that requires patience. First, they'll submit applications to your local municipality for building and electrical permits. In Massachusetts, each city and town has its own requirements and timelines. For example, getting a permit in a large city like Boston or Worcester might take longer due to higher volumes and more stringent reviews compared to a smaller town on Cape Cod.
Concurrently, your installer will apply to your utility company—like Eversource or National Grid—for interconnection approval. This is essentially permission to connect your new solar system to their electrical grid. The utility needs to ensure your system won't negatively impact grid stability and that they can properly meter the electricity you send back to them. This step is particularly important for benefiting from programs like Net Metering Explained: How It Works by State, which allows you to get credit for excess electricity. The permitting and interconnection process can be quite lengthy, often stretching anywhere from 4 to 12 weeks, or even longer in some cases, depending on the responsiveness of local authorities and the utility. Any missing information or questions from their end can add significant delays, which is why a good installer will have a dedicated team for this.
Equipment Procurement and Scheduling
While permits and approvals are underway, your solar installer will also begin procuring the necessary equipment. This includes your solar panels, inverters, racking systems, and any battery storage you might have opted for. The availability of specific brands or models can sometimes influence this timeline, especially if there are global supply chain issues or high demand for particular components. Reputable installers often have established relationships with suppliers to ensure timely delivery, but delays can still occur.
Once all permits are approved and equipment is either on hand or scheduled for delivery, your installer will coordinate with you to schedule the actual on-site installation. They'll need to ensure their crew is available and that the weather forecast looks favorable for roof work. This scheduling phase usually happens right after all necessary paperwork clears, and the actual installation date can be set for a few weeks out. Typically, this stage adds another 2 to 4 weeks to the overall timeline, as they confirm inventory and finalize crew availability.
The On-Site Installation Phase
This is the part that most people think of when they picture "solar installation." It’s the most visible and often the quickest stage, where the physical transformation of your roof into a power-generating asset takes place. While it seems like a big job, an experienced crew can work surprisingly fast.
Roof Preparation and Mounting System
On the day of installation, the crew will arrive and begin by preparing your roof. This involves ensuring the roof surface is clean and safe to work on. They'll then install the racking system, which is the framework that holds the solar panels in place. This mounting system is carefully anchored into your roof's rafters, designed to withstand local wind loads and weather conditions, which are particularly important given Massachusetts' varied climate, from Nor'easters to hot summers.
The process of securing the racking involves identifying optimal points for attachment and ensuring proper waterproofing at each penetration point. Installers use flashing and sealants to prevent leaks, a common concern for homeowners. For example, if you have an asphalt shingle roof, they'll lift shingles, install a flashing plate, and then seal it thoroughly before re-laying the shingle. This initial setup of the mounting system is critical for the longevity and stability of your solar array and typically takes half a day to a full day, depending on your roof's complexity and the system size.
Panel and Inverter Installation
With the racking firmly in place, the crew will then carefully lift and attach each solar panel to the mounts. Each panel is secured, and then the electrical connections begin. If your system uses microinverters, these small devices will be installed directly underneath each panel, converting the DC power to AC right at the source. For systems with a string inverter, panels will be wired together in "strings" that run to a central inverter, typically located on a side wall of your house or in a garage.
The precision and efficiency of the installation team really shine during this phase. They work meticulously to ensure all panels are properly aligned and securely fastened. The installation of the panels themselves, along with the inverters and associated wiring, is usually completed within 1 to 3 days for a typical residential system. This timeline can fluctuate based on the number of panels, the type of inverter technology, and the accessibility of your roof.
Electrical Wiring and System Commissioning
Once the panels and inverters are installed, the electricians on the crew will handle the intricate wiring. This involves connecting the solar array to your home's main electrical panel and, if applicable, to your solar battery. They’ll also install any necessary disconnect switches and monitoring equipment. This part of the installation ensures that the electricity generated by your panels can safely flow into your home and, when producing more than you consume, back into the grid.
After all electrical connections are made, the system is commissioned. This means they will conduct initial tests to ensure everything is functioning correctly and safely. They'll check voltage, current, and connectivity, making sure that each component is communicating as it should. This electrical work and initial system testing can take another half-day to a full day. It's a critical step that ensures your system is ready for the upcoming inspections and ultimately, for activation.
Post-Installation: Inspections and Permission to Operate (PTO)
Even after the physical installation is complete and your system is looking sharp on your roof, you’re not quite ready to start generating your own power. There are still a couple of vital steps involving external parties: local inspections and final utility approval. This is another stage where delays can arise due to scheduling or minor issues that need addressing.
Municipal Inspections
Before your utility company will give you the green light to operate your solar system, your local municipality typically requires final inspections. These usually involve an electrical inspector and sometimes a building inspector. They will check to ensure that the installation adheres to all local building and electrical codes, as well as the approved plans. They’ll look at everything from the mounting system’s security to the quality of the electrical wiring and the placement of safety disconnects.
If any issues are found during these inspections, your installer will need to address them, which could mean rescheduling a follow-up inspection. While most reputable installers aim to pass on the first try, minor adjustments are sometimes needed. Scheduling these inspections can add anywhere from 1 to 3 weeks to your timeline, as you await the availability of municipal inspectors. Your solar provider will typically coordinate these appointments for you.
Utility Interconnection and PTO
Once your system has passed all local municipal inspections, your installer will notify your utility company. The utility will then conduct its own final check, often referred to as the "final interconnection review." They'll ensure that the installation matches the approved interconnection agreement and sometimes they will swap out your existing meter for a new net meter. This special meter tracks both the electricity you draw from the grid and the excess electricity your solar panels send back to it, which is crucial for maximizing your savings under Net Metering Explained: How It Works by State.
After their final review, and if everything is in order, the utility will issue what’s known as Permission to Operate (PTO). This is the official green light, allowing you to turn on your solar system and start generating power! This final utility step can take an additional 2 to 6 weeks after passing municipal inspections. This is often the most anticipated moment for homeowners, as it marks the true beginning of their solar savings and energy independence. The entire journey, from initial inquiry to PTO, can realistically take between 8 to 20 weeks on average in Massachusetts, though some projects can be faster and others, unfortunately, slower.
Factors Influencing Your Massachusetts Solar Timeline
While we've outlined a general timeline, it's crucial to understand that several factors can either speed up or slow down your solar project in Massachusetts. Being aware of these variables can help you better plan and communicate with your installer.
Local Regulations and Permitting Offices
Massachusetts is home to 351 cities and towns, and each one can have its own specific requirements, fees, and processing times for solar permits. What flies quickly in a town like Acton might hit a snag in a historic district of Cambridge. Some municipalities have streamlined their processes for solar installations, sometimes even offering online portals for applications, while others might still rely on paper submissions and slower review cycles. For instance, towns participating in initiatives like "Solarize Massachusetts" often have more efficient permitting.
The complexity of your system can also play a role. A straightforward roof-mount system on a newer home might sail through permits faster than a ground-mount system requiring more extensive electrical work or a system on a historical property needing special approval. Understanding the local permitting landscape is key, and a seasoned Massachusetts solar installer will have a good grasp of the quirks in different towns. This is where a company's experience in navigating local bureaucracy really pays off, potentially shaving weeks off your timeline.
Installer Efficiency and Workload
The solar installer you choose can significantly impact your overall timeline. A highly efficient and well-organized company will have dedicated teams for design, permitting, and installation, ensuring each stage flows smoothly. They'll also have robust project management systems to track your project's progress and proactively address any potential issues. If you're looking for an installer, platforms like Modernize can help you compare reviews and services, giving you a better chance of finding a company with a strong track record for timely installations.
On the flip side, an installer with a heavy workload, staffing shortages, or less streamlined processes might experience delays at various stages. For example, if they're slow to submit permit applications or don't have enough crews to schedule installations promptly, your project could drag on. It's always a good idea to ask potential installers about their typical project timelines and how they manage unexpected delays during your initial discussions. Asking about their process for securing Solar Permit & Interconnection (PTO) Explained can give you insight into their efficiency.
Weather and Unforeseen Delays
Let's face it, Massachusetts weather can be unpredictable! Heavy snow, ice, torrential rain, or high winds can bring roof work to a halt, sometimes for days or even weeks. Installers prioritize safety, so they won't put their crews at risk by working in hazardous conditions. While installations can happen year-round, spring and fall generally offer the most consistently mild weather for solar projects. Winter installations are possible, but significant snowfall will obviously delay work.
Beyond weather, other unforeseen issues can pop up. Sometimes, during the site visit or actual installation, an installer might discover an issue with your roof's integrity, requiring an unexpected repair before panels can be installed. Or perhaps your electrical panel needs an upgrade to handle the solar system, adding another layer of work and inspection. While these are less common, they can add to the timeline. A good installer will communicate openly about any such discoveries and their impact on your project, helping you understand How Much Do Solar Panels Cost After the Tax Credit Expired? and any new costs associated with unforeseen issues.
Here's a quick overview of the typical timeline:
| Phase | Estimated Duration (Weeks) | Key Activities |
|---|---|---|
| Initial Consultation & Design | 1-4 | Site assessment, energy analysis, system design, quote generation. |
| Permitting & Utility Interconnection | 4-12 | Submit local building/electrical permits, utility interconnection application. |
| Equipment Procurement & Scheduling | 2-4 | Order panels, inverters, racking; coordinate delivery; schedule installation date. |
| On-Site Installation | 1-3 days | Roof preparation, mounting system installation, panel/inverter placement, electrical wiring, initial testing. |
| Municipal Inspections | 1-3 | Local building/electrical inspectors review installation for code compliance. |
| Utility PTO (Permission to Operate) | 2-6 | Utility conducts final review, potentially installs new net meter, issues PTO. |
| Total Project Timeline | 8-20+ Weeks | From initial contact to system activation. Varies greatly by location, installer, and specific project details. |
As you can see, the vast majority of the time is spent in the planning and approval phases, not the physical installation. Having this expectation upfront can make the journey feel a lot less frustrating. If you're looking into specific incentives, remember that programs like the Massachusetts SMART Program Explained can also have their own application processes that integrate into this timeline. Keep in mind that a well-designed system, from companies like SunPower or Qcells, will perform better and last longer, making the wait worth it. Don't forget to explore all the available State Solar Incentives: Complete 2026 Guide to maximize your investment.
Disclaimer
This content is for informational purposes only and does not constitute professional advice. Solar installation timelines can vary significantly based on individual circumstances, local regulations, and specific installer processes. Always consult with a qualified solar professional and your local authorities for precise information regarding your project.