How Are Solar Panels Attached to a Roof?
One of the biggest concerns for homeowners considering solar is naturally, "How exactly do they attach these panels to my roof, and will it cause damage?" It's a completely valid worry, and frankly, the thought of someone drilling into your perfectly good roof can be unsettling. This comprehensive guide is here to walk you through the precise methods and considerations involved in securing solar panels, ensuring your peace of mind and the long-term integrity of your home.
Understanding Your Roof's Foundation for Solar
Before any solar panel even touches your roof, a thorough assessment is absolutely crucial. Think of your roof as the foundation for your entire solar energy system – if it's not ready, the whole project can run into issues. This initial phase involves understanding the specific materials your roof is made of and its current condition.
Roof Materials and Their Compatibility
Different roof materials require distinct attachment methods. What works for an asphalt shingle roof won't necessarily work for a tile roof, and a metal roof has its own unique considerations. Understanding these differences is key to a secure and leak-free installation.
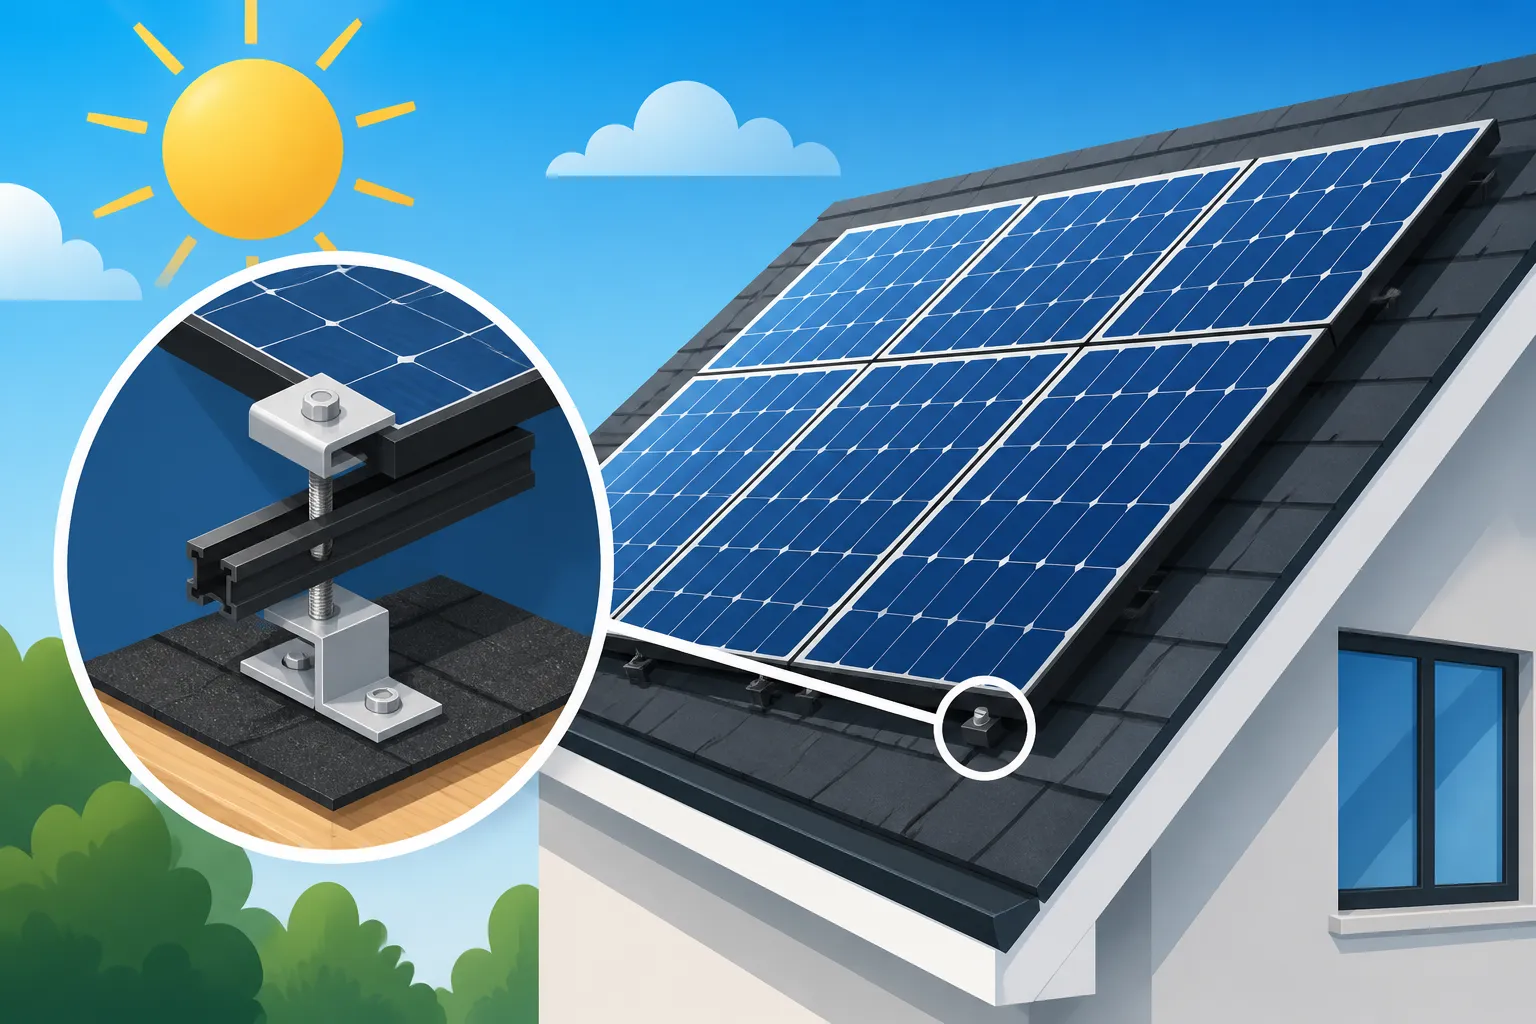
Asphalt shingle roofs are arguably the most common residential roof type in North America, and thankfully, they're generally very compatible with solar installations. The process typically involves lifting a shingle, attaching a flashing to the roof deck, and then bolting into the rafters. This ensures a strong connection directly to the structural elements of your home, not just the shingles themselves. The flashing then gets sealed and the shingle replaced over it, creating a watertight barrier. It’s a tried-and-true method that has been perfected over decades in the solar industry, designed to protect your home.
Tile roofs, such as Spanish or concrete tiles, present a more intricate challenge. Installers often need to carefully remove and replace individual tiles to access the underlying roof deck and rafters. Specialized tile hooks or mounts are used, which slide under the tiles and attach to the roof's structure, often without needing to penetrate the tiles themselves. In some cases, a small portion of a tile might be ground down to allow for a flush fit. The key here is precision and experience to prevent cracking tiles and ensure proper reinstallation and sealing. For a deeper dive, check out our guide on how to install solar panels on a tile roof, which provides more specifics.
Metal roofs, particularly standing seam metal roofs, are often considered ideal for solar. Standing seam roofs have raised seams, and solar panel clamps can often directly attach to these seams without any roof penetration at all. This is a huge advantage for homeowners, as it virtually eliminates the risk of leaks associated with roof penetrations. For corrugated or R-panel metal roofs, specialized screws with rubber gaskets are used to attach the racking directly to the purlins or sheathing, ensuring a weather-tight seal. These roofs typically offer excellent durability and a long lifespan, which aligns well with the 25+ year lifespan of most solar panels.
Assessing Roof Condition and Age
Beyond the material, the overall health and age of your roof are paramount. Installing solar panels is a significant investment, and you don't want to place them on a roof that will need replacing in a few years. It just doesn't make financial sense to pay for a solar installation only to have to pay to remove and reinstall the panels later for a new roof.
A professional solar installer will conduct a thorough site survey to assess your roof's condition, looking for signs of wear, damage, or degradation. They'll examine the shingles for brittleness, curling, or missing granules, check for soft spots in the decking, and ensure the flashing around vents and chimneys is in good shape. If your roof is nearing the end of its expected lifespan (typically 20-25 years for asphalt shingles), most installers will strongly recommend getting a new roof installed before going solar. This can seem like an added expense upfront, but it prevents costly and inconvenient future work, as well as preserving the integrity of your solar warranty. You can learn more about this in our article on whether you need a new roof before solar.
Furthermore, a structural engineer will often review your roof's blueprints or conduct an onsite inspection to ensure it can support the additional weight of the solar panel system, which usually ranges from 2.5 to 4 pounds per square foot. While most residential roofs are built to withstand significant snow loads and high winds, it’s always better to be certain. Your solar installer, like those you might find through platforms like Modernize, will typically handle this structural assessment as part of their service, ensuring your home is structurally sound for the solar addition. This is a crucial step to ensure the safety and longevity of both your roof and your solar investment.
The Core Components of Solar Mounting Systems
Attaching solar panels to a roof isn't just about screws and brackets; it's a sophisticated system of components designed to withstand the elements, protect your roof, and securely hold your panels for decades. These components work together to form a robust, reliable foundation for your solar energy system.
Racking Systems: Rails vs. Rail-less
The "racking system" is the framework that holds your solar panels in place on the roof. Traditionally, this involved long aluminum rails, but newer rail-less systems have emerged, each with its own set of advantages and considerations.
Traditional railed systems are still widely used and highly effective. They consist of parallel aluminum rails that run across your roof, spanning multiple attachment points. Solar panels are then clamped directly to these rails. The rails distribute the weight of the panels evenly and provide a sturdy, continuous mounting surface. One of the main benefits of railed systems is their flexibility; they can accommodate various panel sizes and configurations, and the rails themselves often allow for minor adjustments during installation to ensure everything is perfectly aligned. This design also provides a small air gap between the panels and the roof, which can aid in cooling the panels and improving their efficiency, especially in hotter climates. However, the visible rails can sometimes be a concern for homeowners seeking a very sleek aesthetic.
Rail-less systems are a newer innovation designed for a cleaner, lower-profile look. Instead of long rails, each solar panel is attached directly to specialized mounts that are secured to the roof rafters. These systems typically use fewer components and can reduce installation time, though they often require more precise planning and execution. The primary appeal of rail-less systems is their aesthetics – the panels appear to float closer to the roof surface, creating a more integrated look that many homeowners prefer. Brands like Ecofast from Everest and IronRidge's XR Rail-Less system are examples of these modern solutions. While they offer aesthetic benefits, some installers find them less forgiving during installation, as there's less room for error in panel alignment compared to systems with rails. They also might not be suitable for all roof types or complex roof configurations.
Flashing, Standoffs, and Sealants
Regardless of the racking system chosen, preventing leaks is paramount. This is where flashing, standoffs (or L-feet), and high-quality sealants come into play, forming a critical defense against water intrusion.
Flashing is a thin, weather-resistant material (typically aluminum or stainless steel) that is installed under the roof shingle and around the point where a bolt penetrates the roof. It acts like a mini-skirt, diverting any water that might get past the shingle over the roof penetration, rather than allowing it to seep into the roof deck. The flashing is typically integrated into the shingle course, ensuring it's properly layered with the existing roofing materials. This creates a redundant waterproof barrier, a critical step that good solar installers never skip. Properly installed flashing is the cornerstone of a leak-proof solar system.
Standoffs, often referred to as L-feet due to their shape, are the components that connect the racking system (or the panels directly in rail-less systems) to the roof. They are typically bolted through the flashing into the rafters beneath the roof deck. The "L" shape provides a point of attachment for the rails. These components are designed to be strong and durable, holding the entire weight of the solar array firmly in place, even in high winds or heavy snow. The height of the standoff is also important; it creates the necessary gap between the solar panels and the roof surface for ventilation, which helps prevent overheating and maintains panel efficiency.
Sealants, usually a high-grade, UV-resistant roofing caulk or mastic, are applied around the roof penetrations, often directly to the bolt and/or the flashing. While flashing does most of the heavy lifting for waterproofing, sealants provide an extra layer of protection, filling any tiny gaps and ensuring a completely watertight seal. Installers use specific types of sealants that are designed to withstand extreme temperatures, UV exposure, and remain flexible over many years, preventing cracking or degradation that could lead to leaks. This combination of strong mechanical attachment, layered flashing, and robust sealing is what ensures your roof remains watertight after solar installation.
Step-by-Step: How Solar Panels Are Installed on Common Roof Types
The installation process for solar panels, while sharing common principles, adapts significantly based on your roof type. Each material presents its own set of challenges and demands specific techniques to ensure a secure, efficient, and leak-free system. This meticulous approach is what separates a professional, long-lasting installation from potential headaches down the road. You can dive deeper into the overall process with our guide on How Are Solar Panels Installed? Step by Step to get a broader picture.
Asphalt Shingle Roof Installation
Installing solar panels on an asphalt shingle roof is the most common scenario for residential solar, and installers have developed a highly refined process to ensure durability and weatherproofing.
The process begins with precise measurements and marking. After a thorough site survey and design phase, installers will measure and mark the exact locations of the roof rafters. These rafters are the structural bones of your roof and are essential for securely anchoring the solar racking system. Special tools, like stud finders, are used to locate these hidden beams accurately. Once marked, the areas where mounts will be installed are identified. This precision prevents drilling into random spots and ensures every penetration hits a solid structural member, critical for holding the weight of the panels and withstanding environmental forces.
Next comes the crucial waterproofing step. At each marked rafter location, a small section of the asphalt shingle is carefully lifted, and a pilot hole is drilled into the rafter. Then, a metal flashing plate is slid underneath the shingle and aligned over the pilot hole. This flashing is designed to prevent water intrusion. A lag bolt or similar heavy-duty fastener is then driven through the flashing and pilot hole, securely fastening an L-foot or standoff bracket directly into the rafter. Before fully tightening, a generous amount of sealant (a durable, weather-resistant caulk) is applied around the bolt penetration, creating a watertight seal between the flashing, the bolt, and the roof deck. The shingle is then carefully laid back over the flashing, making the system virtually invisible from a distance.
Once the L-feet or standoffs are securely installed and sealed, the aluminum rails are attached to them. These rails run horizontally across the roof, forming the framework for the solar panels. The panels themselves are then carefully lifted onto the rails and clamped into place using specialized mid-clamps (between panels) and end-clamps (at the ends of rows). Electrical wiring, including microinverters or optimizers, is then installed on the underside of the panels or rails, connecting the panels and sending power down to the main inverter or electrical panel. This methodical approach ensures that the panels are not only firmly attached but also fully integrated with the roof's waterproofing system, often lasting well beyond the typical lifespan of the shingles themselves.
Tile Roof Installation Challenges and Solutions
Tile roofs, while beautiful and durable, pose a unique set of challenges for solar installation due to their brittle nature and specific interlocking designs. Installers must be highly skilled and experienced to work with them without causing damage.
The primary challenge is accessing the roof deck and rafters without breaking tiles. Unlike shingles, tiles cannot simply be lifted and replaced. Installers typically need to identify the exact locations where racking will be mounted, then carefully remove a few surrounding tiles to expose the underlying batten and roof deck. This often involves marking each tile's original position to ensure it can be reinstalled correctly later. This process is delicate and time-consuming, requiring specialized tools and techniques to avoid cracking or chipping the fragile roofing material. Many companies, like those found through resources like Modernize, specialize in tile roof installations because of the specific expertise required.
To overcome these challenges, specialized tile hooks or mounting systems are employed. Instead of drilling directly through the tiles, these hooks are designed to slide under the tiles, attaching to the roof's structural elements (rafters or decking) while allowing the tile to sit back in its original position. The hook then protrudes through the tile where the solar rail can be attached. In some instances, a small section of a tile may need to be carefully ground or cut to allow the hook to pass through cleanly, which is a common practice with concrete or ceramic tiles. This meticulous approach ensures that the tiles remain structurally intact and watertight.
Once the tile hooks are installed and the tiles are carefully re-laid and sealed, the rest of the installation proceeds much like an asphalt shingle roof, with rails attached to the hooks, and panels clamped to the rails. The goal is to make the penetrations as unobtrusive as possible, maintaining the aesthetic integrity of the tile roof while providing a robust anchor for the solar array. Proper sealing around any tile cuts or penetrations is crucial, often using specialized tile adhesive or mastic to maintain the roof's water barrier. This attention to detail ensures that the solar system is secure and the roof remains leak-free.
Metal Roof Installation Techniques
Metal roofs, particularly standing seam varieties, are often considered excellent candidates for solar due to their inherent durability and, in many cases, the ability to install solar without penetrating the roof surface.
For standing seam metal roofs, the installation process is remarkably efficient and non-invasive. These roofs feature raised, interlocking seams running vertically up the roof. Instead of drilling, specialized clamps are used that grip directly onto these seams. These clamps are designed to securely fasten to the seam without piercing the metal, preserving the roof's integrity and factory waterproofing. The solar rails are then bolted directly to these clamps. This method is highly favored because it almost completely eliminates the risk of leaks associated with penetrations. It also means that the solar array can be installed and removed without damaging the roof surface, which can be a significant advantage for long-term maintenance or future roof work. This type of installation is often quicker than on other roof types because it bypasses the need for extensive flashing and sealing at numerous penetration points.
For other types of metal roofs, such as corrugated metal or R-panel roofs, which have exposed fasteners, the installation process is slightly different but still highly effective. In these cases, the solar racking is attached directly to the metal panels using self-tapping screws. Each screw is typically fitted with a rubber gasket or washer designed to create a watertight seal as it's driven into the roof. Installers are careful to drill into the "flats" or valleys of the corrugated profile where water naturally drains, rather than the peaks, to minimize any potential for pooling water around the fasteners. Additional sealant is also commonly applied around each penetration for an extra layer of protection. While this method involves roof penetrations, the combination of specialized screws, gaskets, and sealants ensures a very durable and leak-resistant attachment.
Both methods leverage the inherent strength and longevity of metal roofs. The choice between seam clamps and direct fastening depends entirely on the specific profile of your metal roof. Regardless, a reputable installer will ensure that the attachment method chosen respects the engineering of your metal roof, providing a robust foundation for your solar panels while maintaining the roof's primary function of protecting your home.
Flat Roof Mounting Systems
Flat roofs, common on commercial buildings but also found on some residential properties, require a completely different approach to solar panel attachment compared to pitched roofs. The goal is often to elevate the panels and tilt them to an optimal angle for sunlight capture without compromising the roof's membrane.
One of the most popular methods for flat roofs is a ballasted mounting system. These systems involve placing solar panels on tilted racking structures that are held in place by weights, such as concrete blocks or pavers, rather than being physically bolted to the roof deck. The weights counteract wind uplift and seismic forces, keeping the array firmly in place. The major advantage of ballasted systems is that they typically require zero roof penetrations, preserving the integrity of the roof membrane entirely. This is particularly appealing for roofs with sensitive membranes or for commercial properties where roof warranties are a significant concern. The racking is usually designed to distribute the weight evenly over a large area, ensuring the roof's structural capacity isn't overstressed.
While ballasted systems are common, sometimes a hybrid or fully penetrating system is necessary, especially in areas prone to extreme winds or if the roof's load-bearing capacity is limited. In these cases, penetrations may be used, but with extreme care to ensure the roof membrane is thoroughly sealed. Specialized watertight bases are often installed, which are then integrated and sealed into the roofing material (e.g., adhered to a TPO or EPDM membrane, or flashed into a built-up roof). The tilted racking structures are then bolted to these bases, providing a secure and elevated platform for the solar panels. This method is more involved but offers superior wind resistance compared to purely ballasted systems.
Regardless of the system chosen, proper drainage and roof maintenance remain critical. Installers meticulously plan the array layout to avoid obstructing existing drainage pathways or creating new areas where water could pool. The elevation of the panels also allows for access underneath for cleaning and inspections. For homeowners with flat roofs, understanding these unique mounting options is essential. Your chosen installer, potentially from a network like Modernize, will provide detailed information on the best approach for your specific flat roof type and local building codes.
Ensuring Structural Integrity and Weatherproofing
When you put something new on your roof, especially something as substantial as a solar panel array, you naturally want to know that your home's structure is up to the task and that the installation won't lead to leaks. These are incredibly important considerations that every homeowner should understand and every reputable installer addresses with utmost care.
Weight Distribution and Roof Load
Solar panels, along with their racking systems, add weight to your roof. While individual panels might not seem heavy, a full array can add thousands of pounds. This is why a thorough structural assessment is a non-negotiable step in the solar installation process.
Every roof is designed to withstand a certain amount of "dead load" (the permanent weight of the roof itself) and "live load" (temporary weights like snow, wind, or maintenance workers). Solar panels contribute to the dead load. Most standard residential roofs in the United States are built with sufficient structural integrity to support the additional weight of a typical solar array. A standard solar system usually adds approximately 2.5 to 4 pounds per square foot, which is well within the design limits of most modern roof structures, especially considering roofs are often engineered to handle significant snow loads that can be much heavier. Our article on Can My Roof Hold Solar Panels? provides a detailed explanation of this.
However, a qualified structural engineer must perform a detailed review to confirm your specific roof's capacity. This often involves reviewing your home's blueprints, or if unavailable, a physical inspection of the attic to assess the framing, joists, and trusses. The engineer will calculate the existing loads and compare them against the proposed additional solar load, ensuring that the roof remains safely within its design limits, even under extreme weather conditions like heavy snow or high winds. If any deficiencies are found, the engineer will recommend structural reinforcements. This might sound intimidating, but it's a routine safety measure. Reputable solar companies, like those that partner with a service such as Modernize, include this structural engineering review as a standard part of their installation process, ensuring your home's safety and compliance with building codes.
Protecting Against Leaks and Water Damage
The fear of roof leaks is perhaps the most common anxiety homeowners have about going solar. It's a completely understandable concern. However, modern solar installation practices and materials are specifically designed to make leaks a rarity, not a common occurrence.
The primary defense against leaks is proper flashing and sealing at every single roof penetration point. As discussed earlier, flashing plates are meticulously installed under the shingles and over the drilled holes, creating a physical barrier that sheds water away from the penetration. Think of it as a shingle for the penetration itself, integrated seamlessly into your existing roofing. High-quality, UV-resistant sealants (often a specific type of roofing mastic or caulk) are then applied around the lag bolts and flashing to provide an extra layer of protection, filling any microscopic gaps and ensuring a watertight seal that can withstand years of exposure to sun, rain, and temperature fluctuations. This multi-layered approach is engineered for maximum leak prevention. If you're concerned, reading about Do Solar Panels Cause Roof Leaks? can provide further reassurance.
The expertise of your installer plays a monumental role here. A professional, experienced solar crew understands the nuances of different roof materials and how to apply flashing and sealants correctly for each. They follow strict industry best practices and local building codes, which often mandate specific waterproofing techniques. Many solar companies offer extensive workmanship warranties (often 10-25 years) that cover roof leaks directly attributable to their installation, providing an added layer of homeowner protection. This demonstrates their confidence in their installation methods. Before signing any contract, it's wise to inquire about these warranties and confirm the installer's experience, especially with your specific roof type. This diligence ensures that the only thing flowing into your home from your roof is clean, renewable energy.
The Permitting and Inspection Process
Going solar isn't just about putting panels on a roof; it's also about navigating a series of necessary administrative steps to ensure safety, compliance, and proper integration with your local grid. The permitting and inspection process is a crucial phase that homeowners often find daunting, but it's designed to protect you and your investment.
Local Regulations and Building Codes
Before any physical work can begin, your solar installation project must be approved by your local authority having jurisdiction (AHJ), which is usually your city or county building department. This involves submitting detailed plans, including structural designs, electrical diagrams, and array layouts, for review.
The permitting process can feel like a maze, as requirements vary significantly from one municipality to another. For example, a homeowner in Phoenix, Arizona, might face different requirements than someone in Portland, Oregon, regarding wind load specifications or aesthetic guidelines. These regulations cover everything from structural integrity (ensuring your roof can support the panels), to electrical safety (making sure wiring is up to code), to fire safety (ensuring clear pathways for firefighters), and sometimes even aesthetic considerations (like how visible panels are from the street). The goal is always to ensure that the solar system is installed safely and complies with all relevant safety standards. Navigating these local regulations is a key reason why choosing a reputable solar installer is so important, as they will be familiar with the specific requirements in your area and handle all the paperwork on your behalf. Our detailed guide on Solar Permit Process in California or Solar Permitting & Interconnection (PTO) Explained can give you a better idea of what to expect.
Typically, your solar installer will be responsible for preparing and submitting all necessary permit applications. This involves drawing up detailed blueprints, engineering stamps, and ensuring all documentation meets local codes. This can be a time-consuming part of the process, sometimes taking weeks or even months depending on the efficiency of your local permitting office. It’s also during this phase that your utility company reviews your system design to ensure it can be safely and reliably interconnected to the electrical grid. Only once all permits are issued can physical installation work on your roof officially begin. This rigorous pre-installation phase, while sometimes frustratingly slow, is a vital component of a safe and successful solar project.
What Happens During a Solar Inspection
After your solar panels are installed and before your system can be turned on, it must pass a final inspection by the local building department and, sometimes, an additional inspection by the utility company. This ensures everything was installed according to the approved plans and local codes.
The municipal inspector's visit is a comprehensive check of the entire system. They will look at the physical attachment of the panels to your roof, verifying that the racking is securely bolted into the rafters, that flashing and sealing are properly applied, and that the system is structurally sound. They'll also meticulously inspect the electrical components, including wiring, conduit, inverters (like those from Enphase or SolarEdge), disconnects, and the main service panel, to ensure everything meets National Electrical Code (NEC) standards and local amendments. This includes checking for proper grounding, labeling, and surge protection. Essentially, they are there to guarantee the safety of your home and the people in it. If any issues are found, they will issue a "red tag" or a list of corrections that the installer must address before rescheduling the inspection.
Following a successful municipal inspection, a utility company representative will typically perform their own inspection. This often focuses specifically on the interconnection point between your new solar system and the existing electrical grid. They'll verify the installation of the new net meter (which measures power flowing both to and from your home) and ensure that all connections are safe and conform to their utility-specific standards. Once both inspections are passed, and all documentation is in order, the utility company will grant "Permission to Operate" (PTO). Only after receiving PTO can your solar system officially be turned on and start generating clean electricity for your home. This final stamp of approval is the green light that all homeowners eagerly await, signaling the completion of a long but necessary process.
Post-Installation Considerations and Maintenance
Getting your solar panels installed and powered on is a huge milestone, but it's not quite the end of your journey. Like any major home improvement, a solar energy system benefits from a bit of ongoing attention to ensure it performs optimally and lasts for its full expected lifespan. Thinking about the long game will help maximize your investment.
Monitoring Your System's Performance
Once your solar system receives Permission to Operate, the real fun begins: watching it generate electricity! Modern solar systems come equipped with sophisticated monitoring tools that allow you to track your energy production in real-time.
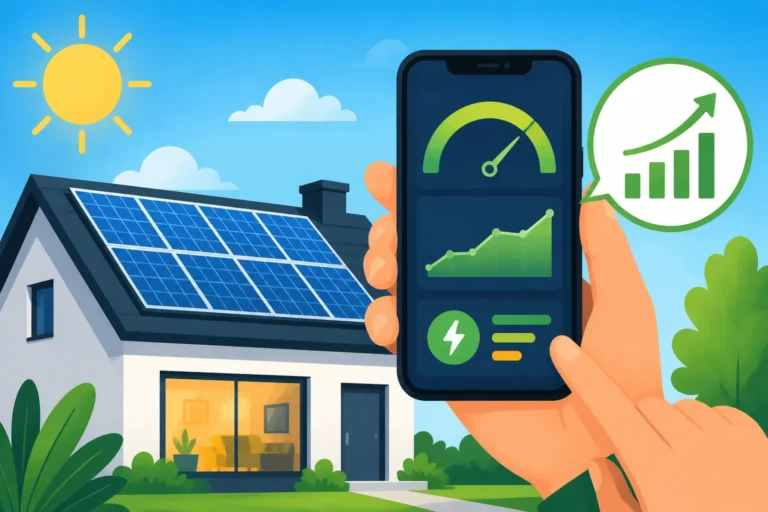
Most solar inverters, whether they are string inverters like those from SolarEdge or microinverters from Enphase, come with accompanying mobile apps or online portals. These platforms provide a wealth of data, showing you how much electricity your panels are producing hour by hour, day by day, and month by month. You can often see historical data, compare your current production to previous periods, and even track your environmental impact (like how much CO2 emissions you've offset). This monitoring is not just a cool gadget; it's an essential tool for ensuring your system is working as expected. If you notice a sudden drop in production that can't be explained by weather, it could signal an issue with a panel or inverter, prompting you to contact your installer for a check-up.
Beyond daily tracking, these monitoring systems often provide alerts for any system malfunctions. For instance, if a microinverter goes offline or a panel isn't performing optimally, you might receive a notification. Many installers also offer professional monitoring services, where they keep an eye on your system remotely and can proactively identify and resolve potential issues, sometimes even before you notice them. This ongoing oversight helps ensure that your investment is continuously delivering maximum value. Familiarizing yourself with your system's monitoring platform is a simple yet effective way to stay engaged with your solar energy production and quickly identify any anomalies.
Long-Term Roof and Panel Health
While solar panels are robust and designed for longevity, a little care for both the panels and the roof beneath them can go a long way in ensuring your system remains efficient and your home protected for decades.
Solar panels themselves generally require minimal maintenance. They are built to withstand harsh weather conditions, from heavy rain and snow to intense sunlight. Natural rainfall often does a decent job of washing away dust and pollen. However, in drier climates or if you notice a significant build-up of dirt, bird droppings, or pollen, occasional cleaning might be beneficial. This typically involves rinsing them with a garden hose – no harsh chemicals or abrasive brushes are needed. Most manufacturers recommend avoiding high-pressure washers, which can potentially damage the panels. If your panels are difficult to access, you might consider hiring a professional solar panel cleaning service, often done once a year or every few years. You can find more tips in our guide on Solar Panel Maintenance & Cleaning.
Equally important is the long-term health of your roof underneath the panels. While the solar installation itself is designed to be leak-proof, your roof will still age. It's a good practice to periodically inspect your roof for any signs of wear and tear, especially around non-solar features like chimneys, vents, and gutters. If your roof is nearing its end-of-life after 20-25 years, you'll eventually need a new one, which means temporary removal and reinstallation of your solar panels. Planning for this can help you budget and coordinate with your solar installer when the time comes. While solar panels add value and protection, they don't make your roof immortal. A proactive approach to roof maintenance ensures that your entire home system, both solar and structural, continues to function optimally for years to come.
Solar Panel Attachment Methods by Roof Type
This table summarizes common attachment methods, their advantages, and typical considerations for different residential roof types.
| Roof Type | Primary Attachment Method(s) | Advantages | Key Considerations |
|---|---|---|---|
| Asphalt Shingle | Flashing with Lag Bolts / L-Feet into Rafters | Common, well-understood, reliable, good waterproofing | Requires roof penetrations; shingle removal/replacement for flashing |
| Tile (Spanish, Concrete) | Tile Hooks / Tile Mounts into Rafters (often with tile grinding) | Preserves tile integrity; aesthetically pleasing | Delicate installation; specific expertise needed; potential tile breakage; higher labor cost |
| Standing Seam Metal | Non-Penetrating Seam Clamps | Zero roof penetrations; preserves roof warranty; quick installation | Only for standing seam profiles; specific clamp compatibility; higher component cost |
| Corrugated/R-Panel Metal | Screws with Gaskets/Washers into Purlins/Sheathing | Secure; suitable for exposed fastener roofs | Requires roof penetrations; proper sealing crucial; potential rust over time |
| Flat Roof (Membrane) | Ballasted Systems (non-penetrating) or Penetrating Stanchions | Ballasted: no penetrations; Penetrating: high wind resistance | Ballasted: significant weight; Penetrating: careful sealing for membrane; aesthetic of tilted panels |
| Wood Shake/Slate | Specialized Mounts/Flashing (similar to tile or custom) | Allows for solar on unique, durable roofs | Very delicate; highly specialized installation; significant cost; brittle materials |
Disclaimer
The information provided in this article is intended for general informational purposes only and does not constitute professional advice. Solar installation methods, regulations, incentives, and costs can vary significantly based on location, roof type, specific products, and local codes. Always consult with a qualified and licensed solar professional and structural engineer for personalized advice regarding your specific property and project.