How Are Solar Panels Installed? Step by Step
Thinking about going solar? It can feel like stepping into a whole new world, full of unfamiliar terms and processes. Many homeowners get overwhelmed just thinking about the "how" of it all – how do solar panels actually get on my roof, and what's involved from start to finish? This guide is here to demystify that entire journey, breaking down the solar panel installation process into easy-to-understand steps, so you know exactly what to expect.
Understanding the Initial Consultation and Site Assessment
Before a single panel even gets designed, there’s a crucial preliminary phase where you and your chosen solar provider get to know each other and, more importantly, your home. This isn't just a casual chat; it's the foundation upon which your entire solar journey will be built. Getting it right here sets you up for success and prevents headaches down the road.
The First Conversation: What to Expect from a Solar Sales Rep
When you first reach out to a solar company, or they reach out to you, it usually starts with an initial consultation. This isn't the high-pressure sales pitch you might be dreading, at least it shouldn't be with a reputable company. Think of it more as an information-gathering session for both sides. The solar sales representative will typically want to understand your current electricity usage, look at your utility bills, and discuss your energy goals. Are you looking to eliminate your electricity bill entirely? Do you want backup power for outages? Or are you simply trying to reduce your carbon footprint? These are important questions that will shape the recommendations.
During this conversation, they'll also likely use satellite imagery and software to get a preliminary look at your roof's suitability. They can usually tell if there are obvious shading issues from trees or neighboring buildings, estimate the roof's size, and identify its orientation. This initial assessment helps them determine if solar is even a viable option for your home before moving forward. It’s also your opportunity to ask tons of questions. Don't be shy about inquiring about their experience, the types of panels they offer, or their warranty policies. Remember, choosing a solar installer is a big decision, so take your time and gather all the information you need. Services like Modernize can connect you with several vetted installers, allowing you to compare offers and ensure you're getting competitive quotes.
The Nitty-Gritty: What Happens During a Site Survey
Once you've decided to move forward with a particular installer, the next critical step is the site survey. This is where a technical team member from the solar company visits your home in person to gather precise measurements and assess every detail that could impact the installation. This isn't just about looking at your roof; it's a comprehensive check of your entire property. They'll measure your roof dimensions, note the pitch, and carefully map out any obstructions like chimneys, vents, skylights, or even existing satellite dishes. They'll also perform a detailed shading analysis, often using specialized tools, to ensure that the initial satellite assessment was accurate and to identify any subtle shading that could impact your system's performance throughout the year.
Beyond the roof, the site survey technician will examine your electrical panel, also known as your breaker box, to ensure it has enough capacity for the new solar system. Sometimes, an electrical panel upgrade is necessary, which can be an additional cost and step in the process. They'll also check for a suitable location for the inverter and other electrical components, usually on an exterior wall or in a garage. During this visit, they might also assess your attic space to understand the roof's structural integrity. This is often when a company might identify that your roof age is a concern and suggest that you consider a Do I Need a New Roof Before Solar? replacement before proceeding with solar, as panels are designed to last 25-30 years, and you don't want to replace your roof halfway through your solar system's lifespan. This thorough inspection is crucial for creating an accurate system design and preventing surprises during the actual installation.
Navigating Design, Permitting, and Approvals
With all the critical information gathered from your initial consultations and site survey, the real behind-the-scenes work begins. This phase is largely out of sight, but it's incredibly important, involving intricate technical design, navigating local regulations, and securing necessary permissions. It’s where your solar dream starts to take concrete form, even if it feels like things are moving slowly.
Crafting Your System: Solar Design and Equipment Selection
After the site survey, the engineering team at your solar company takes all those measurements and observations and translates them into a detailed system design. This isn't just slapping panels onto a roof; it's a precise engineering process that considers everything from your energy consumption patterns to the sun's path across your property. They'll determine How Many Solar Panels Do I Need for My Home? based on your electricity usage and the available unshaded roof space. They’ll also select the appropriate type and number of inverters – whether string inverters, microinverters, or power optimizers – to maximize your system's efficiency and integrate seamlessly with your home's electrical system.
The design will also include the layout of the panels on your roof, ensuring optimal orientation and tilt for maximum sun exposure, while also adhering to setback requirements from roof edges, fire codes, and aesthetic considerations. You’ll usually receive a proposal with these detailed schematics, showcasing where each panel will go and how the components will connect. This is your chance to review everything, ask questions about specific equipment choices, and ensure you're comfortable with the proposed plan. A good solar installer will explain why they chose certain components or panel layouts, giving you confidence in the technical aspects of your future system. It's truly a collaborative process, making sure your system is both efficient and visually appealing.
The Paperwork Maze: Solar Permitting and Interconnection
Once the system design is finalized and you've given it your stamp of approval, the next major hurdle is the permitting process. This is often cited as one of the most time-consuming parts of going solar, and for good reason! Your solar installer will handle this for you, but understanding the steps helps manage expectations. They'll need to submit detailed plans to your local municipal building department to obtain construction permits. These permits ensure that your solar installation adheres to local building codes, electrical codes, and safety regulations. The review times can vary wildly depending on your city or county; some areas might process permits in a couple of weeks, while others could take several months.
Beyond local building permits, there's also the crucial step of obtaining utility interconnection approval. This is permission from your electricity provider to connect your new solar system to their grid. The utility company needs to ensure that your system is safe, meets their technical requirements, and won't negatively impact the local electrical infrastructure. This often involves a separate application and review process, which might be particularly complex in states with evolving policies like California with NEM 3.0 or New York with its specific programs. Your installer will manage this, but it's another layer of paperwork and approvals that adds to the overall Solar Installation Timeline: What to Expect. They'll make sure all the i's are dotted and t's are crossed so your system can legally and safely start producing power.
The Installation Day: What Really Happens on Your Roof
After what might feel like an eternity of waiting for designs and permits, the day finally arrives when the solar installation crew shows up at your house. This is often the quickest phase of the entire process, though it involves a flurry of activity and skilled labor. It’s exciting to see the transformation, but it’s also important to understand the careful steps involved to ensure a safe and effective system.
Roof Preparation and Mounting the Racking System
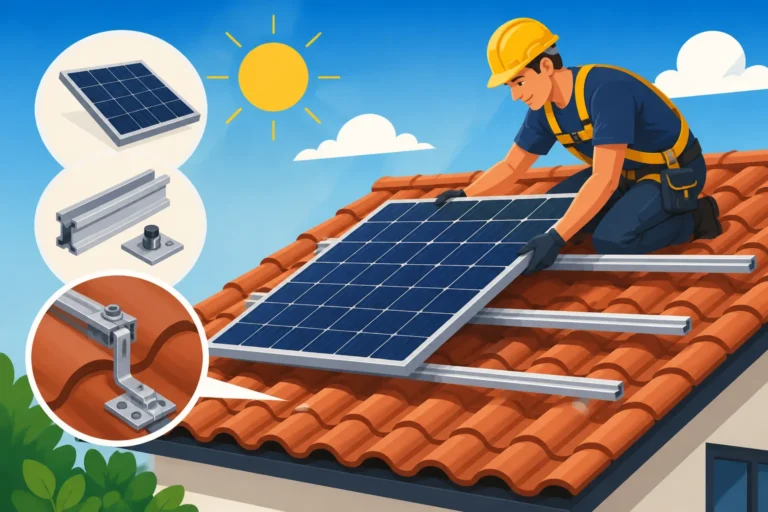
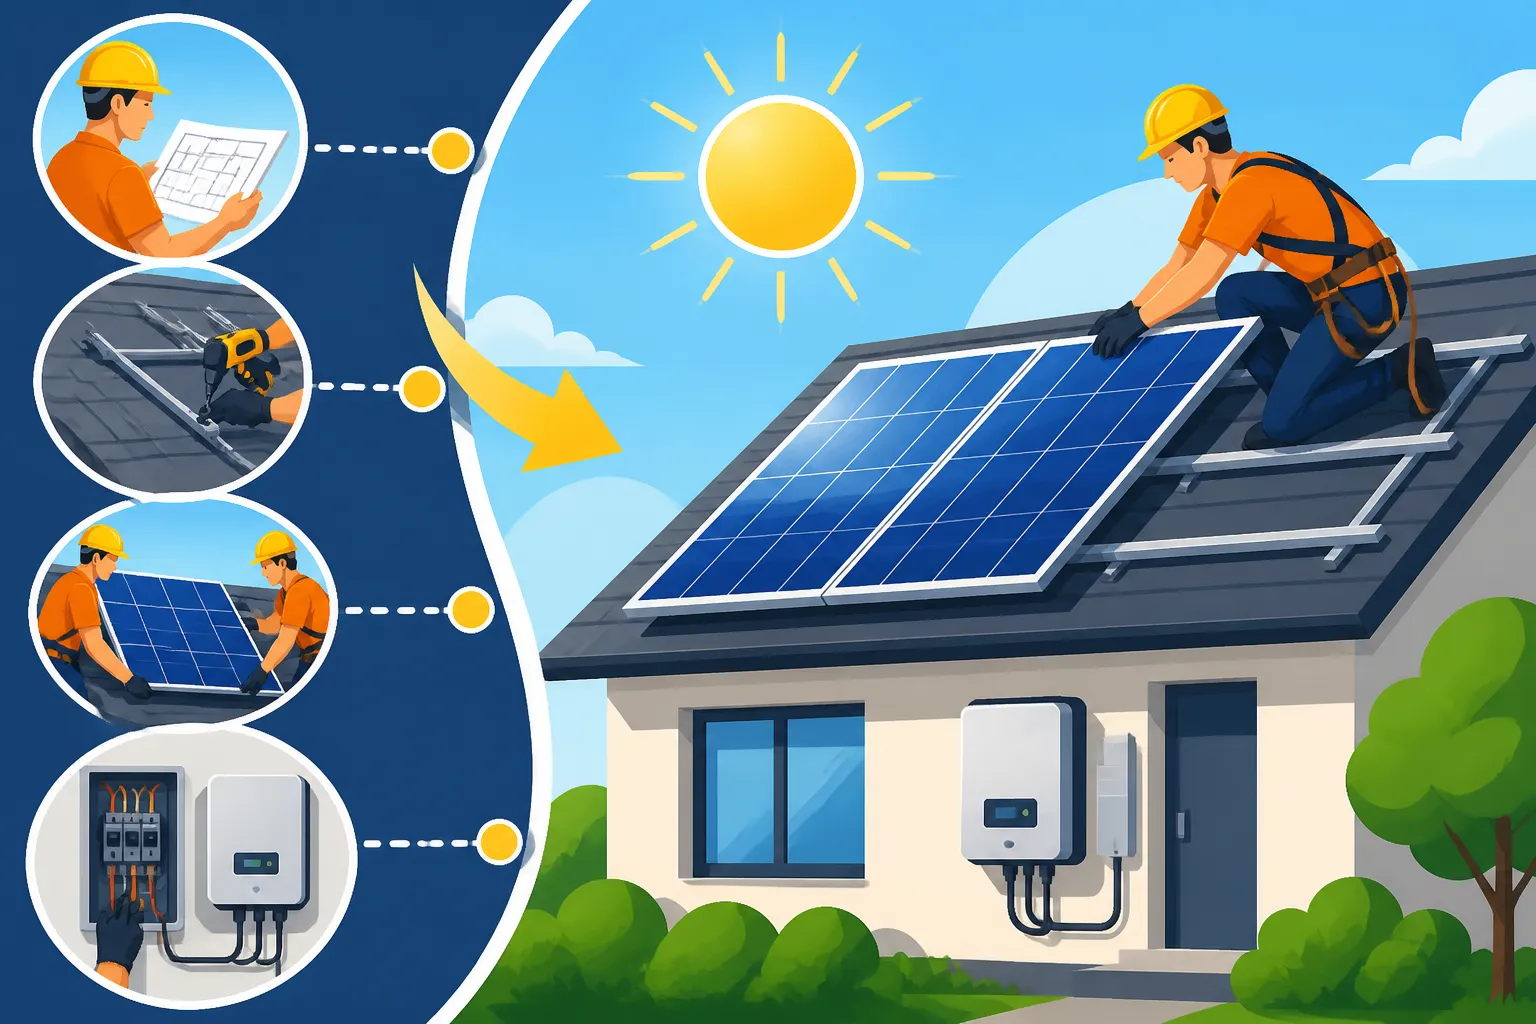
When the installation crew arrives, their first task is usually to prepare the roof. This means making sure the work area is safe and clear. They'll bring up the necessary tools and equipment, including safety gear, and often lay down tarps or other protective coverings on the ground below to catch any debris. For most residential installations, the crew will begin by locating the roof rafters, which are the structural supports beneath your roof's surface. They use specialized tools, like stud finders, to pinpoint these rafters accurately.
Once the rafters are identified, they will begin installing the mounting hardware. This typically involves attaching small, metal "standoffs" or "flashing" directly to the rafters. These pieces are crucial because they create a secure anchor point for your solar panels while also protecting your roof from leaks. High-quality installations will use flashing that integrates seamlessly with your existing roofing material, creating a watertight seal around the penetration points. On top of these standoffs, aluminum rails are then fastened. These rails form the framework – the "racking system" – upon which your solar panels will ultimately rest. This stage requires precision to ensure the rails are level, properly spaced, and securely anchored to withstand various weather conditions, from high winds to heavy snow. This is a good time to understand the specifics of How Are Solar Panels Attached to a Roof? on your particular roof type.
Attaching the Panels and Electrical Wiring
With the racking system firmly in place, the crew then begins the satisfying process of lifting and securing the solar panels themselves. Each panel is carefully positioned onto the aluminum rails and clamped down using specialized clips. Depending on the size of your system, this can be a surprisingly quick process once the initial setup is complete. Modern panels are designed to be relatively lightweight and easy to handle for experienced installers.
As the panels are being installed, the electrical work simultaneously gets underway. This involves connecting the panels to each other and then routing the wiring down to your inverter and electrical panel. If your system uses microinverters or power optimizers, these small devices are usually mounted directly on the back of each panel or along the racking system. For string inverter systems, the panels are wired in series, and the main conduit runs from the array down to a central inverter, typically located on a side wall of your house or in the garage. The electrical conduits are carefully routed and secured to the side of your home, designed to be as inconspicuous as possible while adhering to all electrical codes. This stage is critical for safety and efficiency, ensuring that the DC power generated by the panels is correctly converted to AC power for your home's use, and that all wiring is protected from the elements.
Connecting to the Grid and Final Inspections
Seeing your solar panels on the roof is a huge milestone, but your system isn't quite ready to generate electricity for your home or send excess power back to the utility grid just yet. There are a few more vital steps involving electrical connections and crucial inspections to ensure everything is up to code and safe to operate.
The Interconnection Process and Meter Swaps
Once the physical installation of the panels, inverters, and associated wiring is complete, the next significant phase involves connecting your system to the utility grid. This is what allows your home to draw power from the grid when your solar panels aren't producing enough (like at night or on very cloudy days) and, critically, to send any excess solar electricity you generate back to the grid. This process, often part of Solar Interconnection Process Explained, is governed by your utility company. Your installer will notify the utility that the physical installation is complete and request the final interconnection.
In many cases, the utility will need to replace your existing electricity meter with a new "net meter." A net meter is specially designed to measure electricity flow in both directions: power you draw from the grid and power you send back to the grid. This bidirectional measurement is essential for Net Metering Explained: How It Works by State programs, allowing you to get credit for the surplus energy your panels produce. The utility typically schedules a technician to perform this meter swap. This step can sometimes add a bit of waiting time to the overall process, as it's dependent on the utility's scheduling and workload. Without the new meter, your system might be physically installed, but it can't officially begin interacting with the grid as intended.
Final City and Utility Inspections
Before your solar system can officially be turned on and start generating power, it must pass a series of mandatory inspections. These inspections are a vital safeguard, ensuring that the installation was completed safely, correctly, and in full compliance with all local building and electrical codes, as well as utility requirements. Typically, there are two main types of inspections.
First, your local municipal building department will conduct a final inspection. This inspector will meticulously check the structural integrity of the mounting system, the electrical wiring, grounding, conduit runs, and overall adherence to the approved plans and local codes. They're looking for things like proper flashing to prevent leaks, secure panel attachments, correct labeling of electrical components, and compliance with setback rules. If any issues are found, they'll issue a "correction notice," and your installer will need to fix them before a re-inspection can be scheduled. Second, the utility company will perform its own final inspection, often at the same time as the meter swap, or shortly thereafter. This inspection focuses on ensuring the system is safely interconnected to their grid and meets all their specific technical standards. They want to make sure the system won't pose a hazard to their workers or the public, and that it's ready for safe operation. Passing both these inspections is the final bureaucratic hurdle before your system can truly come alive.
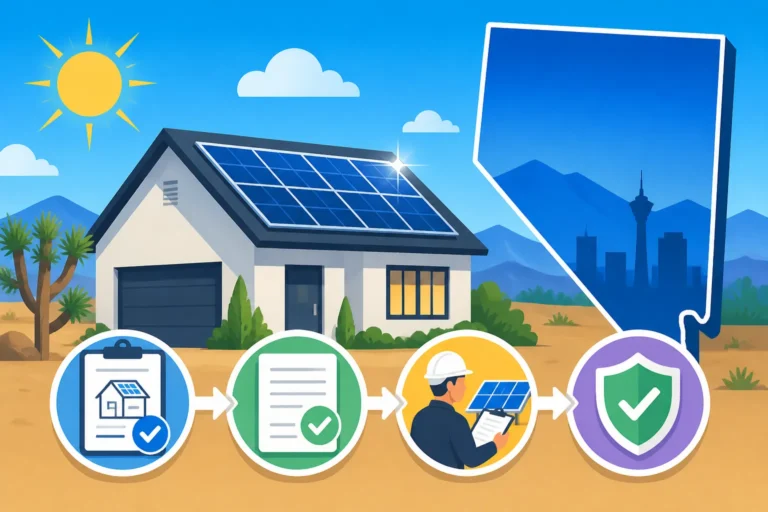
Here's a quick overview of the key milestones in the solar installation process:
| Phase | Key Activities | Typical Duration (Approx.) |
|---|---|---|
| Initial Contact & Assessment | Consultation, preliminary design, site survey | 1-3 Weeks |
| Design & Permitting | System engineering, permit applications, utility approval | 4-12 Weeks (Highly variable) |
| Installation | Racking, panels, electrical, inverter | 1-3 Days |
| Inspections & Interconnection | City/county final inspection, utility meter swap, utility final inspection | 2-6 Weeks |
| Activation | Permission to Operate (PTO) received, system turned on | Immediate (after PTO) |
Activation and Ongoing Monitoring
You've made it through the consultations, the designs, the permits, and the physical installation. You've passed all the necessary inspections. Now, it's time for the truly exciting part: turning your system on and watching it produce clean energy! But the journey doesn't end there; understanding how to monitor and maintain your system ensures you get the most out of your investment for decades to come.
Receiving Permission to Operate
The moment you've been waiting for, the official "go-ahead" to power up your solar system, is known as What Is Permission to Operate (PTO)?. After your system passes both the municipal and utility inspections, the utility company will issue this critical document. PTO is essentially the utility's formal authorization for you to energize your solar panels and connect them to their electrical grid. Without PTO, even if your panels are installed and wired, they cannot legally or safely generate electricity back into the grid.
Once your installer receives the PTO from the utility, they will contact you, often immediately, to schedule the system activation. This is a very exciting day! Typically, an installer technician will visit your home, flip the necessary breakers and switches to turn on your inverter, and then perform a quick check to ensure everything is functioning as expected. They'll confirm that the panels are producing power, the inverter is operating correctly, and that the system is communicating with its monitoring platform. From this point forward, your home will be powered by the sun, and any excess electricity will begin flowing back to the grid, contributing to your net metering credits.
Understanding Your System's Performance and Monitoring Apps
With your solar system officially live, the next step is to get comfortable with monitoring its performance. Most modern solar systems come equipped with sophisticated monitoring capabilities, often accessible through a user-friendly mobile app or a web portal. Brands like Enphase and SolarEdge, for example, offer robust platforms that provide real-time data on your system's production. You can usually see how much electricity your panels are generating at any given moment, track daily, weekly, monthly, and annual production totals, and even compare your system's performance against historical data.
This monitoring is incredibly valuable. It allows you to How to Monitor Solar Panel Performance and quickly identify if there are any issues, such as a panel underperforming due to shading or a component malfunction. For instance, if you notice a sudden drop in production on a sunny day, the app might help you pinpoint which specific panel (if you have microinverters) or string (if you have a string inverter) is affected. Many apps also provide insights into your home's energy consumption, giving you a clearer picture of your overall energy usage and how your solar production offsets it. Getting familiar with your monitoring system from day one empowers you to be an active participant in your solar journey, ensuring your investment is always working efficiently for you.
Potential Hurdles and How to Overcome Them
While the solar installation process has become increasingly streamlined, it's not always a perfectly smooth ride. Homeowners can sometimes encounter unexpected delays or issues. Being aware of these potential hurdles can help you prepare mentally and strategically, making the experience less stressful if they arise.
Common Delays and Unexpected Challenges
One of the most common frustrations homeowners face during solar installation is delays. The solar installation timeline can be quite fluid, and there are several points where things can get held up. We've already touched on permitting; varying municipal workloads and stricter codes in certain areas can significantly prolong the approval process. For instance, in a rapidly growing city like Austin, Texas, or many parts of California, permit backlogs can stretch for weeks or even months. Utility interconnection queues can also be surprisingly long, especially in regions with high solar adoption, as utilities must ensure grid stability and manage a large volume of applications.
Beyond paperwork, unexpected site-specific issues can pop up. During the site survey, an installer might discover that your electrical panel needs an upgrade because it doesn't have the capacity for solar, or perhaps the main service line to your home needs reinforcement. These can add extra steps, costs, and delays. Sometimes, the initial structural assessment of your roof might reveal that minor repairs or reinforcements are needed before panels can be safely installed, especially on older homes. Furthermore, supply chain issues, though less common now than during the pandemic, can occasionally delay the delivery of specific panels, inverters, or batteries. The best way to navigate these challenges is to choose an installer that communicates openly and transparently about potential delays and has a track record of resolving them efficiently. Using a service like Modernize can help you find installers with solid reputations who are committed to good communication.
Troubleshooting Initial Issues and Warranty Claims
Once your system is up and running, it's not entirely unheard of for minor issues to surface during the first few weeks or months. Perhaps a panel isn't producing as much as its neighbors, or the monitoring system occasionally loses connection. These are usually small kinks that can be easily resolved. Your installer should provide a comprehensive handover, explaining how to use your monitoring app and who to contact if you notice any discrepancies. Many installers also offer a post-installation check-up to ensure everything is settling in correctly.
For more significant problems, understanding your warranties is paramount. Solar systems typically come with several types of warranties: a product warranty for the panels (covering manufacturing defects, usually 25 years), a performance warranty for the panels (guaranteeing a certain level of power output over time, also usually 25 years), an inverter warranty (typically 10-12 years), and an installer's workmanship warranty (covering the installation itself, usually 5-10 years). If a component fails or the installation proves faulty, these warranties are your protection. For example, if your Enphase microinverter fails within its warranty period, your installer would facilitate its replacement, covered by the manufacturer's warranty. Keep all your documentation handy, including your contract and warranty details, so you know exactly who to contact and what recourse you have if an issue arises.
Preparing Your Home for Solar
While the solar installation team handles the heavy lifting, there are certain aspects of your home you should consider or prepare before the process even begins. Thinking ahead about these factors can prevent costly surprises and ensure your solar system performs optimally for decades. It's about laying a solid groundwork for your renewable energy future.
Roof Longevity and Structural Considerations
One of the most fundamental considerations for any homeowner going solar is the condition and age of their roof. Solar panels are designed to last 25 to 30 years or even longer, and removing them to replace a roof partway through that lifespan can be an expensive and unnecessary hassle. Imagine having to pay for panel removal, re-installation, and possibly new permitting fees! That's why solar professionals will always advise you to carefully evaluate your roof's remaining lifespan. If your asphalt shingle roof is nearing the end of its typical 20-25 year life, or if you have visible signs of wear and tear, it often makes financial sense to Do I Need a New Roof Before Solar? replacement before the solar installation begins.
Beyond age, the structural integrity of your roof is also critical. While modern solar panels are relatively lightweight, a complete system adds a significant amount of weight. Most residential roofs are built to withstand the weight of snow loads and wind, so they are usually structurally sound enough for solar. However, your installer's site survey will always include a structural assessment, and if there are any doubts, they might recommend a structural engineer's review. This is particularly important for older homes or those with unique roofing materials. Ensuring your roof is in excellent condition and structurally sound from the outset provides peace of mind and guarantees that your solar investment will be protected for its full lifespan.
Understanding Shading and Optimal Panel Placement
The amount of electricity your solar panels produce is directly dependent on the amount of sunlight they receive. This makes understanding and mitigating shading a crucial step in preparing your home for solar. During the initial consultation and detailed site survey, your installer will perform a comprehensive shading analysis. This involves identifying any obstructions – trees, chimneys, dormers, neighboring buildings – that might cast shadows on your roof throughout the day and across different seasons. Even partial shading on just one panel can significantly reduce the output of an entire string of panels if you have a traditional string inverter system.
While a south-facing roof is generally considered ideal for solar panels in the Northern Hemisphere, it's not the only viable option. East and west-facing roofs can also be highly effective, especially if your energy consumption peaks in the morning or late afternoon. The key is maximizing direct sunlight exposure. If significant shading from a tree is identified, you might consider trimming or even removing it, if feasible, to improve your system's performance. Sometimes, careful placement of panels, or the use of microinverters (like those from Enphase) or power optimizers (like SolarEdge), can help mitigate the impact of unavoidable shading, as these technologies allow individual panels to perform independently. Discussing these options with your installer is vital to ensure your system is designed for optimal production, considering your home's unique environmental factors.
The Long-Term Solar Ownership Experience
Once your solar panels are installed, activated, and diligently producing clean energy, your journey as a solar homeowner truly begins. This isn't just about flipping a switch; it's about a long-term relationship with your energy production, understanding how to maintain your system, and knowing what to expect over its extensive lifespan. It's an investment that keeps giving back, year after year.
Solar Panel Maintenance and Cleaning
One of the great advantages of solar panels is their relatively low maintenance requirements. Unlike a car or a traditional HVAC system, there are very few moving parts to break down. However, "low maintenance" doesn't mean "no maintenance." The primary concern for most homeowners will be keeping the panels clean to ensure maximum sunlight absorption. Dirt, dust, pollen, bird droppings, and leaves can accumulate on the surface of the panels, reducing their efficiency. The good news is that in many regions, regular rainfall is often enough to keep your panels adequately clean.
However, if you live in a particularly dry, dusty area (like parts of Arizona) or notice a significant buildup of debris, a periodic cleaning might be beneficial. You can typically clean panels yourself using a hose and a soft brush, much like washing a car, though safety should always be your top priority when working on a roof. Many homeowners opt for professional cleaning services, especially if their roof is steep or difficult to access. Beyond cleaning, it's a good practice to visually inspect your panels a couple of times a year for any obvious damage, loose wiring, or excessive debris buildup. Your inverter or monitoring system may also alert you to potential issues. Generally, if you follow these simple steps, your Solar Panel Maintenance & Cleaning efforts will be minimal, yet effective in preserving your system's performance.
Understanding Warranties and Degradation Over Time
As mentioned earlier, solar panels are built to last, and manufacturers back this up with extensive warranties. Typically, you'll see product warranties guaranteeing against manufacturing defects for 25 years, and performance warranties assuring that your panels will still produce a certain percentage (e.g., 80-85%) of their original output even after 25 years. This brings us to the concept of solar panel degradation. It's a natural process: like any electronic device, solar panels lose a tiny fraction of their efficiency each year. This degradation rate is usually very small, often less than 0.5% per year. So, a panel that produces 400 watts today might produce 398 watts next year, and so on.
This slow, predictable decline in output is factored into your system's design and financial projections. It's why a 25-year performance warranty is so important – it protects you if your panels degrade faster than expected. Beyond the panels themselves, remember that your inverter also has a warranty, typically 10-12 years. If your inverter fails outside this period, it would be an out-of-pocket replacement, but newer inverters are designed for longevity and many can be replaced individually without affecting the entire system. Understanding these warranties and the natural degradation curve helps you manage expectations for your system's long-term performance and ensures you're protected for the decades of clean energy production ahead.
Choosing the Right Partner: Your Solar Installer
The solar panels, inverters, and racking systems are all critical components, but perhaps the most crucial "component" of your entire solar journey is the company that installs it all. Your solar installer is your partner through every step, from initial consultation to flipping the switch and beyond. Making an informed decision here can make all the difference in your experience and the long-term success of your system.
Qualities of a Reputable Solar Installer
Selecting a high-quality, trustworthy solar installer is paramount. This isn't just a transaction; it's a long-term relationship, as your installer will be your first point of contact for any questions, maintenance, or warranty claims for years to come. One of the most important qualities to look for is transparency. A reputable installer will be upfront about all costs, the permitting process, potential timelines, and the specifics of the equipment they propose. They won't try to hide "dealer fees" in financing or pressure you into a quick decision. Look for companies that have been in business for a significant period, as this often indicates stability and experience.
Another key indicator is their licensing and certifications. Ensure they are properly licensed to perform electrical and construction work in your state and local municipality. Certifications from organizations like the North American Board of Certified Energy Practitioners (NABCEP) demonstrate a commitment to industry standards and expertise. Customer reviews and testimonials are also invaluable. Check independent review sites like Google, Yelp, or industry-specific forums to see what other homeowners in your area have experienced. Pay attention not just to positive reviews, but also how the company responds to negative feedback, as this can reveal a lot about their customer service commitment. Finally, consider their warranty offerings for both equipment and workmanship. A strong workmanship warranty shows confidence in their installation quality.
Getting Multiple Quotes and Asking the Right Questions
Never, ever settle for the first quote you receive. One of the best pieces of advice for any homeowner considering solar is to How to Compare Solar Installer Quotes. The solar market is competitive, and getting multiple quotes (ideally three to five) will provide you with a comprehensive understanding of pricing, equipment options, and different installer approaches. While comparing bids, don't just look at the bottom line. Pay close attention to the "price per watt," as this metric allows for an apples-to-apples comparison across different system sizes.
When you're interviewing potential installers, come prepared with a list of What Questions to Ask a Solar Installer. Ask about their specific experience with your roof type or in your local area. Inquire about the brands of panels and inverters they typically use and why they recommend those particular products for your home. Understand their warranty policies, both for the equipment and their workmanship. Ask about their estimated timeline for each phase of the project, from permitting to activation, and how they handle communication if delays arise. Furthermore, ask about their post-installation support – who do you call if you have a question or an issue after your system is live? A good installer will welcome these questions and provide clear, detailed answers, making you feel confident and informed throughout the entire process. Tools like Modernize can simplify this by connecting you with pre-vetted installers, making it easier to gather and compare multiple competitive quotes without the hassle of searching endlessly.
Disclaimer
Please note that this guide provides general information about the solar panel installation process. Specific timelines, permitting requirements, incentives, and utility regulations can vary significantly based on your location, local ordinances, and utility company policies. Always consult with a qualified local solar installer and relevant authorities for advice tailored to your specific situation.