Solar Installation Timeline: What to Expect
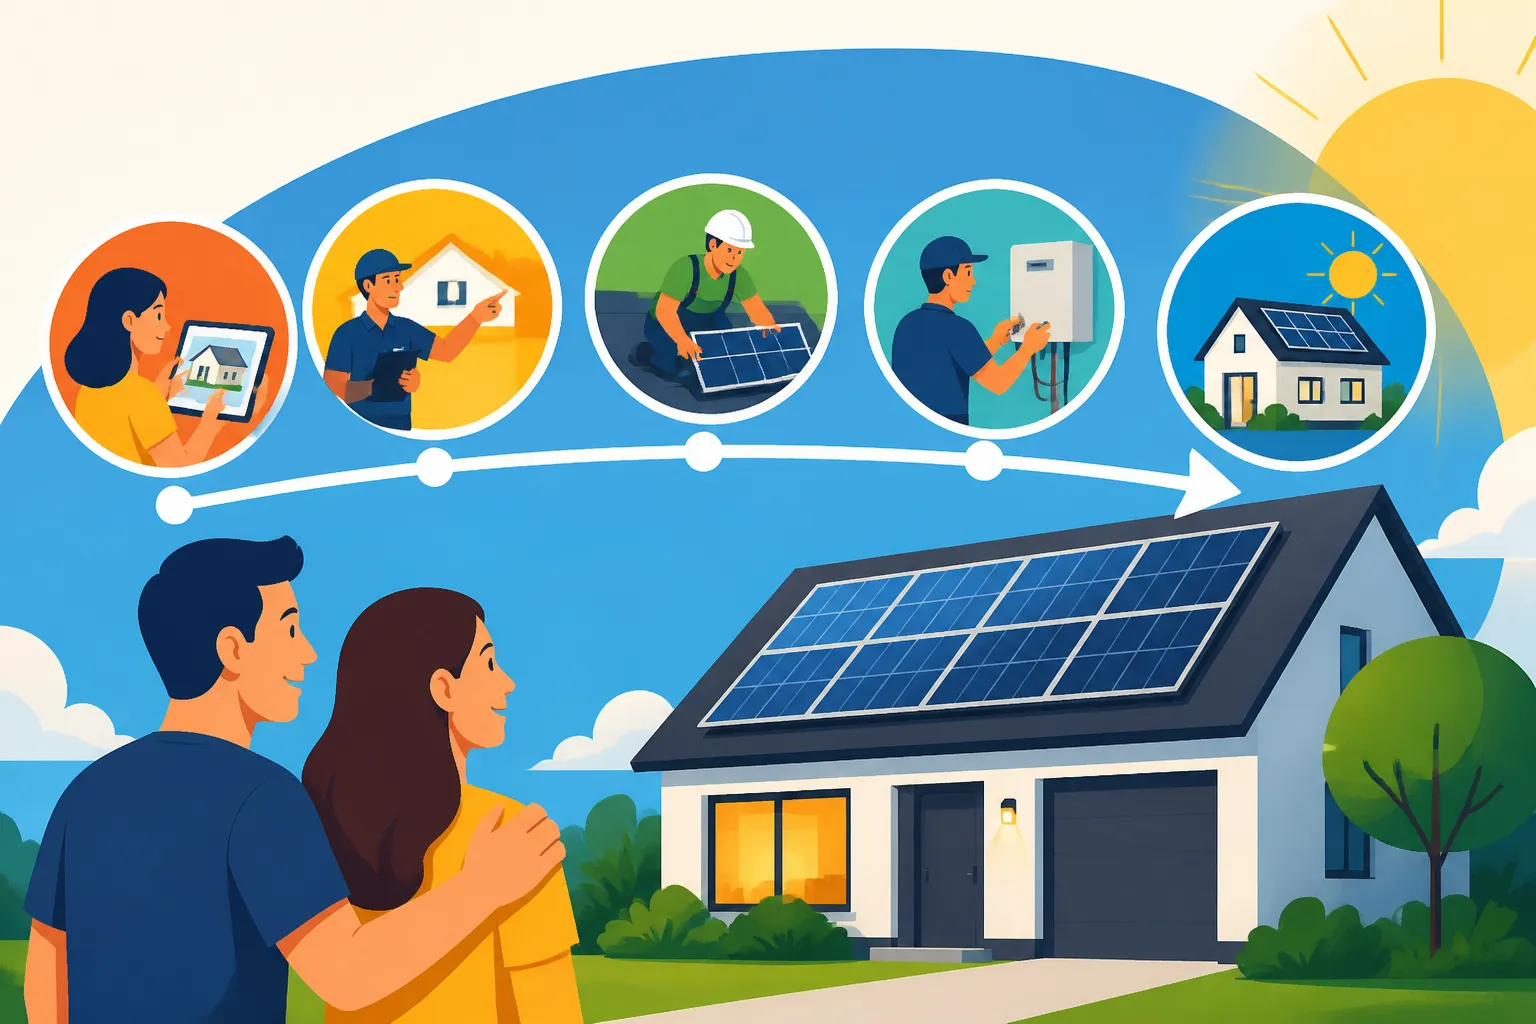
Thinking about going solar can feel like stepping into a confusing maze of questions, from "How much will it cost?" to "How long will this whole thing take?" It's a completely valid frustration to feel overwhelmed by the unknown steps involved in transforming your home with solar energy. This comprehensive guide will walk you through the entire solar installation timeline, from your very first research click all the way to enjoying your first sunny, bill-reducing day.
The Initial Spark: From Curiosity to Consultation
The journey to solar often begins with a flicker of curiosity – maybe you're tired of skyrocketing electricity bills, concerned about your carbon footprint, or just intrigued by the shiny panels you see on your neighbors' roofs. But turning that curiosity into a tangible project involves several crucial first steps that lay the groundwork for your entire solar experience.
Researching and Finding Reputable Installers
Let's be honest, the solar industry can feel a bit like the Wild West sometimes. You're bombarded with ads, cold calls, and conflicting information, making it incredibly tough to figure out who you can trust. It's not just about finding any installer, but finding one who is reliable, experienced, and genuinely cares about your specific needs. Many homeowners start by asking friends and family for recommendations, especially if they've had a positive experience. Online reviews on platforms like Google, Yelp, and the Better Business Bureau are also invaluable resources, offering real-world insights into an installer's customer service, project management, and post-installation support. Look for patterns in reviews – consistent praise for professionalism or recurring complaints about delays or poor communication.
A great starting point for many is using services that connect you with pre-vetted local solar installers, like Modernize. These platforms can streamline the process, helping you bypass some of the initial legwork of sifting through countless companies. They often have networks of installers who have already met certain quality and licensing standards, giving you a bit more peace of mind. Remember, this isn't a purchase you make lightly, so taking your time to vet potential partners is a smart investment in your home's future. For more tips on finding the right team, check out our guide on how to choose a solar installer.
The First Contact: Getting Your Free Quote
Once you have a shortlist of potential installers, the next step is reaching out for quotes. This usually involves a phone call or an online form submission where you provide some basic information about your home, your electricity usage, and your interest in solar. Don't be shy about getting multiple quotes – it's practically a requirement to ensure you're getting a fair price and a comprehensive understanding of your options. Each installer might offer slightly different equipment, financing options, or warranty packages, so comparing them side-by-side is essential.
During this initial conversation, be prepared to discuss your current electricity bills. Installers often ask for 12 months of usage data to accurately size a system that will offset your consumption. This is a critical step because an undersized system won't save you as much money, and an oversized system can be an unnecessary expense, especially in states with less favorable net metering policies. Don't hesitate to ask detailed questions about the proposed system, the components they plan to use, and any potential hidden costs. This is your chance to understand the "Solar Panel Cost Per Watt Explained" for your specific scenario.
Understanding the Site Assessment and Design
After reviewing initial quotes and selecting a few front-runners, the installer will typically schedule a more in-depth site assessment. This isn't just a quick look at your roof; it's a comprehensive evaluation by a qualified professional. They'll measure your roof dimensions, assess its structural integrity, and identify any potential shading issues from trees or neighboring buildings that could impact solar production. They'll also examine your electrical panel to ensure it can handle the new solar system, noting if an upgrade is necessary. This is where those crucial "Roof Considerations for Solar Panels" come into play.
Using the data gathered during the site assessment, the solar design team will then create a custom system tailored to your home. This design typically includes the number and placement of panels, the type of inverter (string, microinverter, or power optimizer), and the electrical connections. They'll also factor in local zoning ordinances, HOA restrictions, and aesthetic preferences. This detailed design forms the blueprint for your installation, ensuring optimal performance and compliance with all regulations. It's a really exciting moment when you first see your home envisioned with solar panels!
The Nitty-Gritty: Navigating Paperwork and Approvals
This phase often feels like the slowest part of the solar journey, and it's where many homeowners experience frustration. The truth is, getting permission to install and operate a solar system involves a surprising amount of paperwork and navigating various bureaucratic channels. But understanding these steps can help manage expectations and reduce stress.
The Permitting Maze: Local Government Approvals
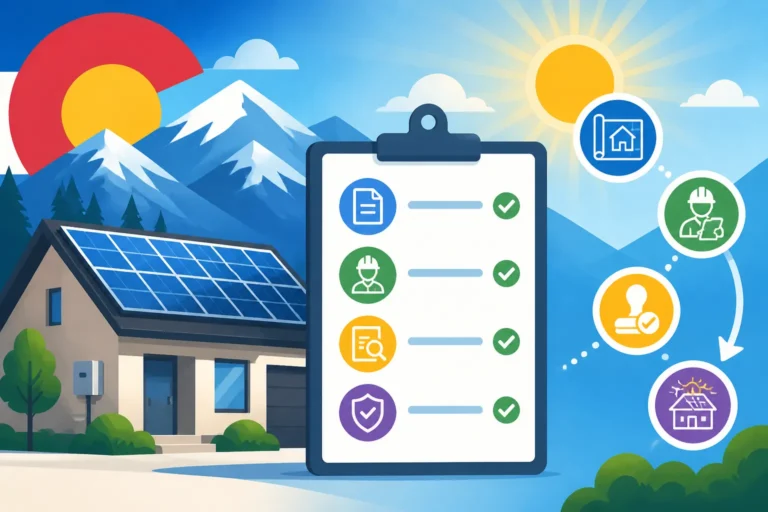
Before any actual construction can begin, your solar project needs to receive several layers of approval from your local municipality. This process can vary wildly depending on where you live – a homeowner in a small town might have a smoother experience than someone in a sprawling city like Los Angeles or New York. Typically, your installer will be responsible for submitting all necessary plans and applications to the city or county planning and building departments. These applications include detailed drawings, structural calculations, and electrical schematics to ensure the system meets all safety and building codes.
The waiting game here is real. Depending on the efficiency of your local permitting office, this phase can take anywhere from a few weeks to several months. Some jurisdictions, like parts of California, have made efforts to streamline the solar permitting process, but delays are still common. It’s not unusual for permits to be sent back for revisions, requiring your installer to make adjustments and resubmit. This back-and-forth can add weeks to the timeline. It's a good idea to communicate regularly with your installer to get updates on the status of your permits, so you’re not left wondering. Our guide on Solar Permit Process in California provides a good example of how complex this can be in specific areas.
Utility Interconnection Agreements
Beyond local government approval, you also need permission from your utility company to connect your new solar system to their electrical grid. This is known as an interconnection agreement, and it’s a critical step that ensures your system can safely export excess electricity back to the grid and that you’ll be properly credited for it through mechanisms like net metering. Each utility has its own specific set of forms, requirements, and review processes. For instance, utilities like Pacific Gas & Electric (PG&E) in California or Con Edison in New York have established procedures that can be quite detailed.
The interconnection application often requires the installer to provide technical specifications of your solar equipment, safety certifications, and proof of local permitting. Once submitted, the utility reviews these documents to ensure your system won't disrupt grid stability or safety. This review period, much like permitting, can take a significant amount of time. You might also need to have a special "net meter" installed by the utility to accurately track the electricity you send to and draw from the grid. This crucial step is part of what we explain in detail in our article about Solar Permitting & Interconnection (PTO) Explained. Without this agreement, you cannot legally operate your solar system, even if it's fully installed.
Securing Financing and Incentives
While the permitting and interconnection processes are underway, you'll also finalize the financial aspects of your solar project. This includes securing a solar loan, if you're financing, or making arrangements for a cash purchase. If you’re taking out a loan, the approval process will involve credit checks and paperwork, similar to any major home improvement loan. Installers often work with preferred lenders to offer competitive rates, but it's always wise to explore your options. You might find some excellent insights into this topic by reading our Solar Loans: Complete Guide.
This is also the stage where all the exciting solar incentives come into play. Many states and even some local utilities offer rebates, tax credits, or performance-based incentives that can significantly reduce the overall cost of your system. For example, some homeowners might be eligible for Utility Solar Rebates: How to Find Yours. Your installer should help you identify and apply for these incentives, providing guidance on how to maximize your savings. Keeping track of all these financial moving parts can feel like a part-time job, but the long-term savings make it absolutely worth the effort.
Pre-Installation Preparations: What Happens Before the Crew Arrives
After the permitting and financial hurdles are cleared, the anticipation really starts to build! This phase is all about getting everything lined up so that when the installation crew shows up, they can hit the ground running. It involves logistical planning and a few important checks to ensure a smooth installation.
Roof Assessment and Potential Upgrades
Even after the initial site assessment, a more detailed roof inspection might be necessary before installation begins. This is particularly true if your roof is older or if the initial assessment raised any red flags about its condition. Your roof is the foundation of your solar system, and it needs to be in tip-top shape to support the panels for their entire 25+ year lifespan. It's far more cost-effective to address any issues now than to remove and reinstall panels later for a roof repair. Many homeowners use this opportunity to get a new roof, especially if their current one is nearing the end of its life, as installing solar panels on a brand new roof simplifies future maintenance.
An installer will confirm that your roof can handle the additional weight of the solar panels and racking equipment. They'll look for signs of wear, weak spots, or areas that might need reinforcement. If your roof needs repairs or replacement, your solar installer might have recommendations for roofing contractors, or you might choose to handle it independently. For a typical homeowner with a sound asphalt shingle roof, this step might be quick, but for older homes or unique roofing materials like tile or slate, it's a critical pre-check. Our article on Do I Need a New Roof Before Solar? covers this topic in depth.
Ordering Equipment and Scheduling Installation
Once all permits are approved and financing is secured, your installer will officially order all the necessary solar equipment. This includes the solar panels themselves (which you might have picked from a list of "Best Solar Panels of 2026"), inverters, racking systems, wiring, and any optional components like solar batteries. The availability of equipment can sometimes influence the timeline, especially if specific brands or models are in high demand or facing supply chain issues. Reputable installers like those found through Modernize often have established relationships with manufacturers, which can help ensure timely delivery.
After the equipment is ordered and a delivery date is confirmed, your installer will schedule the actual installation dates. This is usually coordinated to minimize disruption to your daily life. They’ll also confirm the crew size, the estimated duration of the installation, and what you can expect on those days. It's a good idea to confirm any specific access requirements for their vehicles or equipment at this point. Communication is key here, so make sure you have a clear understanding of when the crew will arrive and how long they expect to be working on your property.
Preparing Your Home for the Installation Day
With the installation date set, there are a few things you can do to prepare your home and make the process smoother for everyone involved. First, ensure that the areas around your electrical panel and your roof access points are clear and easily accessible. This might mean moving patio furniture, clearing shrubs, or tidying up your garage if your inverter is to be installed there. If you have pets, make arrangements to keep them safely indoors or away from the work area to prevent any accidents.
It's also a good idea to inform your immediate neighbors about the upcoming work. They'll appreciate a heads-up about the presence of construction vehicles, potential noise, and temporary disruptions. While solar installation is generally not overly intrusive, power tools and roof work can generate some noise. Finally, identify any power outlets the crew might need access to for their tools and consider providing them with access to a restroom. These small considerations can go a long way in fostering a positive relationship with your installation team.
Installation Day(s): The Physical Transformation
This is often the most exciting part of the journey for homeowners – seeing your solar vision come to life on your roof! The actual installation itself is typically a swift and efficient process, usually taking just a few days, depending on the size and complexity of your system.
Panel Mounting and Racking System Installation
The first step on installation day is typically the installation of the racking system. This is the structural framework that securely attaches your solar panels to your roof. Installers will carefully mark out the layout, ensuring precise alignment and optimal spacing. They'll drill pilot holes, seal them to prevent leaks (a common concern many homeowners have, but modern techniques make this very safe), and then attach the mounting brackets. These brackets are secured directly into your roof rafters, providing a strong, durable foundation.
Once the mounting brackets are in place, the rails are attached to create a continuous support system. The quality of the racking system is paramount, as it needs to withstand various weather conditions, including high winds and heavy snow loads, for decades. Reputable installers use high-quality, corrosion-resistant materials, typically aluminum, to ensure longevity. This process is a skilled one, requiring precision and adherence to safety protocols, and it's fascinating to watch the framework take shape on your roof, like a giant, futuristic grid. Our detailed guide on How Are Solar Panels Installed? Step by Step offers a visual journey of this process.
Electrical Wiring and Inverter Setup
After the racking is complete, the solar panels themselves are carefully hoisted onto the roof and secured to the racking system. Each panel is then wired together in a series or parallel configuration, depending on the inverter technology being used. This DC (direct current) electricity then flows to the inverter, which is the brain of your solar system. The inverter's job is to convert the DC electricity generated by the panels into AC (alternating current) electricity, which is what your home appliances use and what the utility grid accepts.
The inverter, whether it's a string inverter, microinverters installed under each panel, or power optimizers paired with a central inverter, will be mounted in a designated location. This could be in your garage, on an exterior wall, or near your main electrical panel. The AC electricity from the inverter is then routed through a conduit to your home’s main electrical panel. A dedicated circuit breaker is installed to safely integrate your solar power with your home’s existing electrical system. This work is always performed by licensed electricians to ensure everything meets stringent safety codes.
System Testing and Quality Checks
Once all the physical components are installed and wired, the installation crew will conduct a series of thorough tests to ensure everything is working correctly and safely. This often involves checking voltage and amperage readings at various points in the system, verifying all connections, and ensuring that the inverter is communicating properly. They'll also perform a visual inspection of the entire array to confirm proper panel placement, secure wiring, and a clean installation aesthetic.
These initial tests are crucial for identifying and correcting any issues on-site before the system is officially energized. Your installer might show you how to read the monitoring system, which often comes as a mobile app or a web portal, allowing you to track your system's production in real-time. This is often an exciting moment when you can see the numbers ticking up, demonstrating the power your new panels are generating. For those keen on understanding the specifics, our article on How Much Power Does a Solar Panel Produce? provides more context.
The Final Hurdles: Inspections and Activation
You're almost there! The solar panels are on your roof, the wiring is complete, and the system has been tested. However, before you can flip the switch and start generating your own electricity, there are a couple more critical steps involving external parties: inspections and final utility approval.
Local Inspections: Ensuring Code Compliance
Once your solar system is physically installed, your local building department will schedule one or more inspections. The purpose of these inspections is to ensure that the installation adheres to all local building codes, electrical codes, and safety standards. This is not just a formality; it's a critical safety measure to protect your home and everyone in it. The inspector will check everything from the structural integrity of the racking system and how it’s attached to your roof to the wiring, conduit runs, and the proper grounding of the entire system.
It's common for an inspector to find minor issues that need correction, such as labeling requirements or small adjustments to wiring. Don't be alarmed if this happens; it's part of the process and ensures that everything is done correctly. Your installer will typically handle any necessary adjustments and schedule re-inspections until the system passes with flying colors. The duration of this phase depends heavily on the inspector's schedule and the number of re-inspections required, sometimes adding an extra week or two to the overall timeline.
Utility Permission to Operate (PTO)
This is the ultimate green light you've been waiting for! After your system passes all local inspections, your installer will notify your utility company. The utility will then conduct its own final review and, if everything is in order, grant you Permission to Operate (PTO). This is arguably the most significant milestone in the entire solar installation timeline. Without PTO, you cannot legally switch on your system and connect it to the grid. Trying to do so before receiving PTO can result in fines or even safety hazards.
The utility's review process varies. Some utilities might conduct a final site visit to verify the installation and install or activate your net meter, which measures the two-way flow of electricity. Others might grant PTO based solely on documentation from your installer and the local building department. The waiting period for PTO can sometimes be the longest and most frustrating part of the whole process, ranging from a few days to several weeks, particularly in areas with high volumes of solar installations. Understanding "What Is Permission to Operate (PTO)?" is crucial here, as it signifies your official entry into solar energy production.
Activating Your Solar System and Monitoring Performance
The moment you receive PTO is incredibly satisfying. With the utility's official blessing, your installer will likely walk you through the final steps of activating your system. This often involves flipping a main breaker or activating the inverter. Then, it's time to celebrate! Your home is now generating its own clean electricity. You'll immediately start seeing the benefits on your monitoring app, watching your energy production in real-time.
Your installer should also provide you with a detailed explanation of your monitoring system, showing you how to access your production data, understand your energy usage patterns, and troubleshoot minor issues. This real-time visibility is not just cool; it's empowering, allowing you to track your savings and optimize your energy consumption. It’s a moment of real pride, knowing you’re making a tangible difference for your wallet and the planet.
What to Expect Post-Installation: Living With Solar
Getting your system up and running isn't the end of the story; it's just the beginning of your life with solar. Understanding what comes next in terms of bills, maintenance, and long-term support will help you maximize your investment and enjoy years of clean energy.
Understanding Your New Electricity Bills
This is one of the biggest questions on everyone's mind! Once your solar system is active and generating power, your electricity bill will look quite different. Instead of just showing your consumption, it will now reflect your net usage – the difference between the electricity your home consumed from the grid and the excess electricity your solar panels sent back to the grid. In most net metering scenarios, if your solar panels produce more electricity than you use in a given month, you'll receive credits on your bill that can be applied to future months or, in some cases, paid out annually. Our article on Net Metering Explained: How It Works by State delves into this in detail.
It's important to remember that you'll still typically receive a bill from your utility company, even if you have a net-zero energy home. This bill often includes fixed charges for grid connection and minimum service fees. The goal of solar is to drastically reduce or even eliminate the variable charges for electricity consumption. It might take a month or two to fully understand how your new billing cycle works with solar, but your installer should be able to walk you through an example bill and help you interpret your first few statements.
Maintenance and Monitoring Your System
One of the great advantages of modern solar panel systems is their minimal maintenance requirements. Unlike traditional HVAC systems or water heaters that need annual tune-ups, solar panels generally require very little hands-on care. Most systems are designed to be self-cleaning to a certain extent, with rain usually sufficient to wash away dust and dirt. However, in drier climates or if you notice a significant accumulation of debris like pollen or bird droppings, occasional cleaning might be beneficial to maintain optimal efficiency. Our guide on Solar Panel Maintenance & Cleaning offers practical tips for keeping your system sparkling.
Beyond physical cleaning, the most important aspect of maintenance is ongoing monitoring. Your solar monitoring system (often an app or online portal provided by your inverter manufacturer like Enphase or SolarEdge) allows you to track your system's performance in real-time. You can see how much electricity your panels are producing, identify any dips in production, and catch potential issues early. Many systems also include alerts that notify you or your installer if a problem is detected, ensuring that any performance issues are addressed promptly.
Warranties and Long-Term Support
When you invest in solar, you're not just buying equipment; you're buying peace of mind for decades to come. Solar systems come with multiple warranties that protect your investment. There's typically a product warranty for the solar panels themselves (covering manufacturing defects), a performance warranty (guaranteeing a certain level of power output over 20-25 years), and an inverter warranty. Additionally, your installer will usually provide a workmanship warranty covering the installation quality. For instance, top brands like Qcells often boast comprehensive warranties.
It's absolutely crucial to understand the terms and duration of all these warranties before you sign any contracts. Know who to call if you suspect an issue – your installer is usually your first point of contact for any service needs or warranty claims. A reputable installer will stand behind their work and the products they install, offering long-term support and service. This ongoing relationship ensures that your solar system continues to operate efficiently and effectively throughout its lifespan.
Common Delays and How to Mitigate Them
While the promise of solar is bright, the path to installation can sometimes be bumpy. It's realistic to expect a few hiccups along the way, but understanding common delays can help you navigate them with more patience and foresight.
Permitting and Utility Backlogs
As touched upon earlier, the permitting and utility interconnection phases are notorious for causing delays. Local government building departments and utility companies often operate with limited staff and are handling a growing number of solar applications. This can lead to backlogs, especially in rapidly expanding solar markets. A permit that might take two weeks in one county could take two months in a neighboring one, simply due to administrative load. It’s a frustrating reality for both homeowners and installers.
To mitigate these delays, your best bet is to choose an experienced installer who is deeply familiar with the local permitting processes and utility requirements in your area. An installer connected through Modernize, for example, often has this critical local expertise. They will know the specific forms, typical timelines, and common pitfalls for your jurisdiction, allowing them to submit complete and accurate applications from the start, minimizing the chances of rejection or requests for revision. Regular, proactive communication from your installer about the status of these approvals is also key to managing expectations.
Supply Chain Issues and Equipment Delays
In today's global economy, supply chains for everything from cars to solar panels can be volatile. Unforeseen events, such as natural disasters, geopolitical tensions, or even shifts in manufacturing capacity, can lead to delays in receiving solar panels, inverters, or other critical components. While installers try to stock common equipment, specific panel models or battery solutions like a Tesla Powerwall might face longer lead times. This can be incredibly frustrating when you're ready to go solar, and you're just waiting on a particular piece of equipment.
Working with an installer who has strong relationships with multiple manufacturers or who maintains a robust inventory can help minimize this risk. They might be able to source alternative, comparable equipment if there's a delay with your first choice, or they might have priority access to certain brands. Flexibility on your part, if possible, regarding specific equipment choices can also help avoid prolonged waits. Always ask your installer about current lead times for the components they are proposing.
Weather and Unexpected Site Challenges
Solar installation is, by its nature, an outdoor construction project. This means it's inherently subject to the whims of Mother Nature. Heavy rain, high winds, snow, or extreme heat can all halt installation work for safety reasons, adding days or even weeks to the schedule. While installers will always try to work efficiently, they will not compromise the safety of their crew or the integrity of your system by working in hazardous conditions.
Beyond weather, unexpected challenges can sometimes arise during the physical installation. This could be anything from discovering unforeseen structural issues with your roof once tiles are removed, to encountering outdated or non-compliant electrical wiring that requires an upgrade before the solar can be connected. While reputable installers conduct thorough site assessments, some things only become apparent once work begins. Again, open communication with your installer is paramount here. They should immediately inform you of any unexpected issues, explain the necessary steps to resolve them, and provide an updated timeline.
Estimated Solar Installation Timeline Breakdown
To give you a clearer picture, here's a general breakdown of what to expect for a typical residential solar installation. Keep in mind that these are averages, and your specific timeline can vary significantly based on your location, utility, and the complexity of your system.
| Phase | Estimated Duration | Key Activities | Potential Delays |
|---|---|---|---|
| Initial Research & Quotes | 1-4 weeks | Online research, contacting installers (e.g., via Modernize), comparing proposals, initial consultations. | Decision-making time, getting multiple quotes. |
| Site Assessment & Design | 1-2 weeks | Detailed roof/electrical inspection, energy usage analysis, custom system design. | Scheduling conflicts, complex roof structures. |
| Contract Signing & Financing | 1-3 weeks | Finalizing agreements, securing solar loans or cash payment. | Loan approval process, customer review period. |
| Permitting & Utility Interconnection | 4-16 weeks (highly variable) | Submission of applications to local building department and utility company, reviews, potential revisions. | Local government backlogs, utility review times, resubmissions. |
| Equipment Ordering & Delivery | 2-6 weeks | Installer places order for panels, inverters, racking; equipment shipped to site. | Supply chain issues, manufacturer delays, specific equipment availability. |
| Physical Installation | 1-5 days | Racking installation, panel mounting, electrical wiring, inverter setup, initial system tests. | Inclement weather, unforeseen site conditions, crew availability. |
| Local Inspections | 1-4 weeks | Building department/electrical inspection, addressing any necessary corrections, re-inspections. | Inspector availability, failed initial inspections. |
| Utility Permission to Operate (PTO) | 1-4 weeks | Utility reviews inspection results, installs/activates net meter, grants final approval. | Utility backlogs, scheduling meter install. |
| System Activation & Monitoring | 1-2 days | Flipping the switch, homeowner walkthrough of monitoring system. | N/A |
| TOTAL ESTIMATED TIMELINE | 3 to 9+ months | From initial contact to generating electricity. The longest variable is permitting and PTO by far. |
Disclaimer
The information provided in this guide is intended for general informational purposes only and does not constitute professional advice. Solar system requirements, incentives, costs, and timelines can vary significantly based on your specific location, utility provider, home characteristics, and current regulations. Always consult with qualified solar professionals and financial advisors for personalized recommendations.